
Browse the docs
Dashboard reference
Open in dashboardEvery Konkui workspace comes with a public storefront: a shop website built from your Products where customers can browse, add to cart and check out. Settings › Storefront controls how it looks, what shoppers can do there, what checkout charges, and how customers pay.
Any workspace member can change the storefront. Only workspace admins can change Shipping & Tax.
Where to find it
Open Settings in the sidebar and choose the Storefront tab, or go to Settings › Storefront. The Storefront Settings button on Products leads here too.
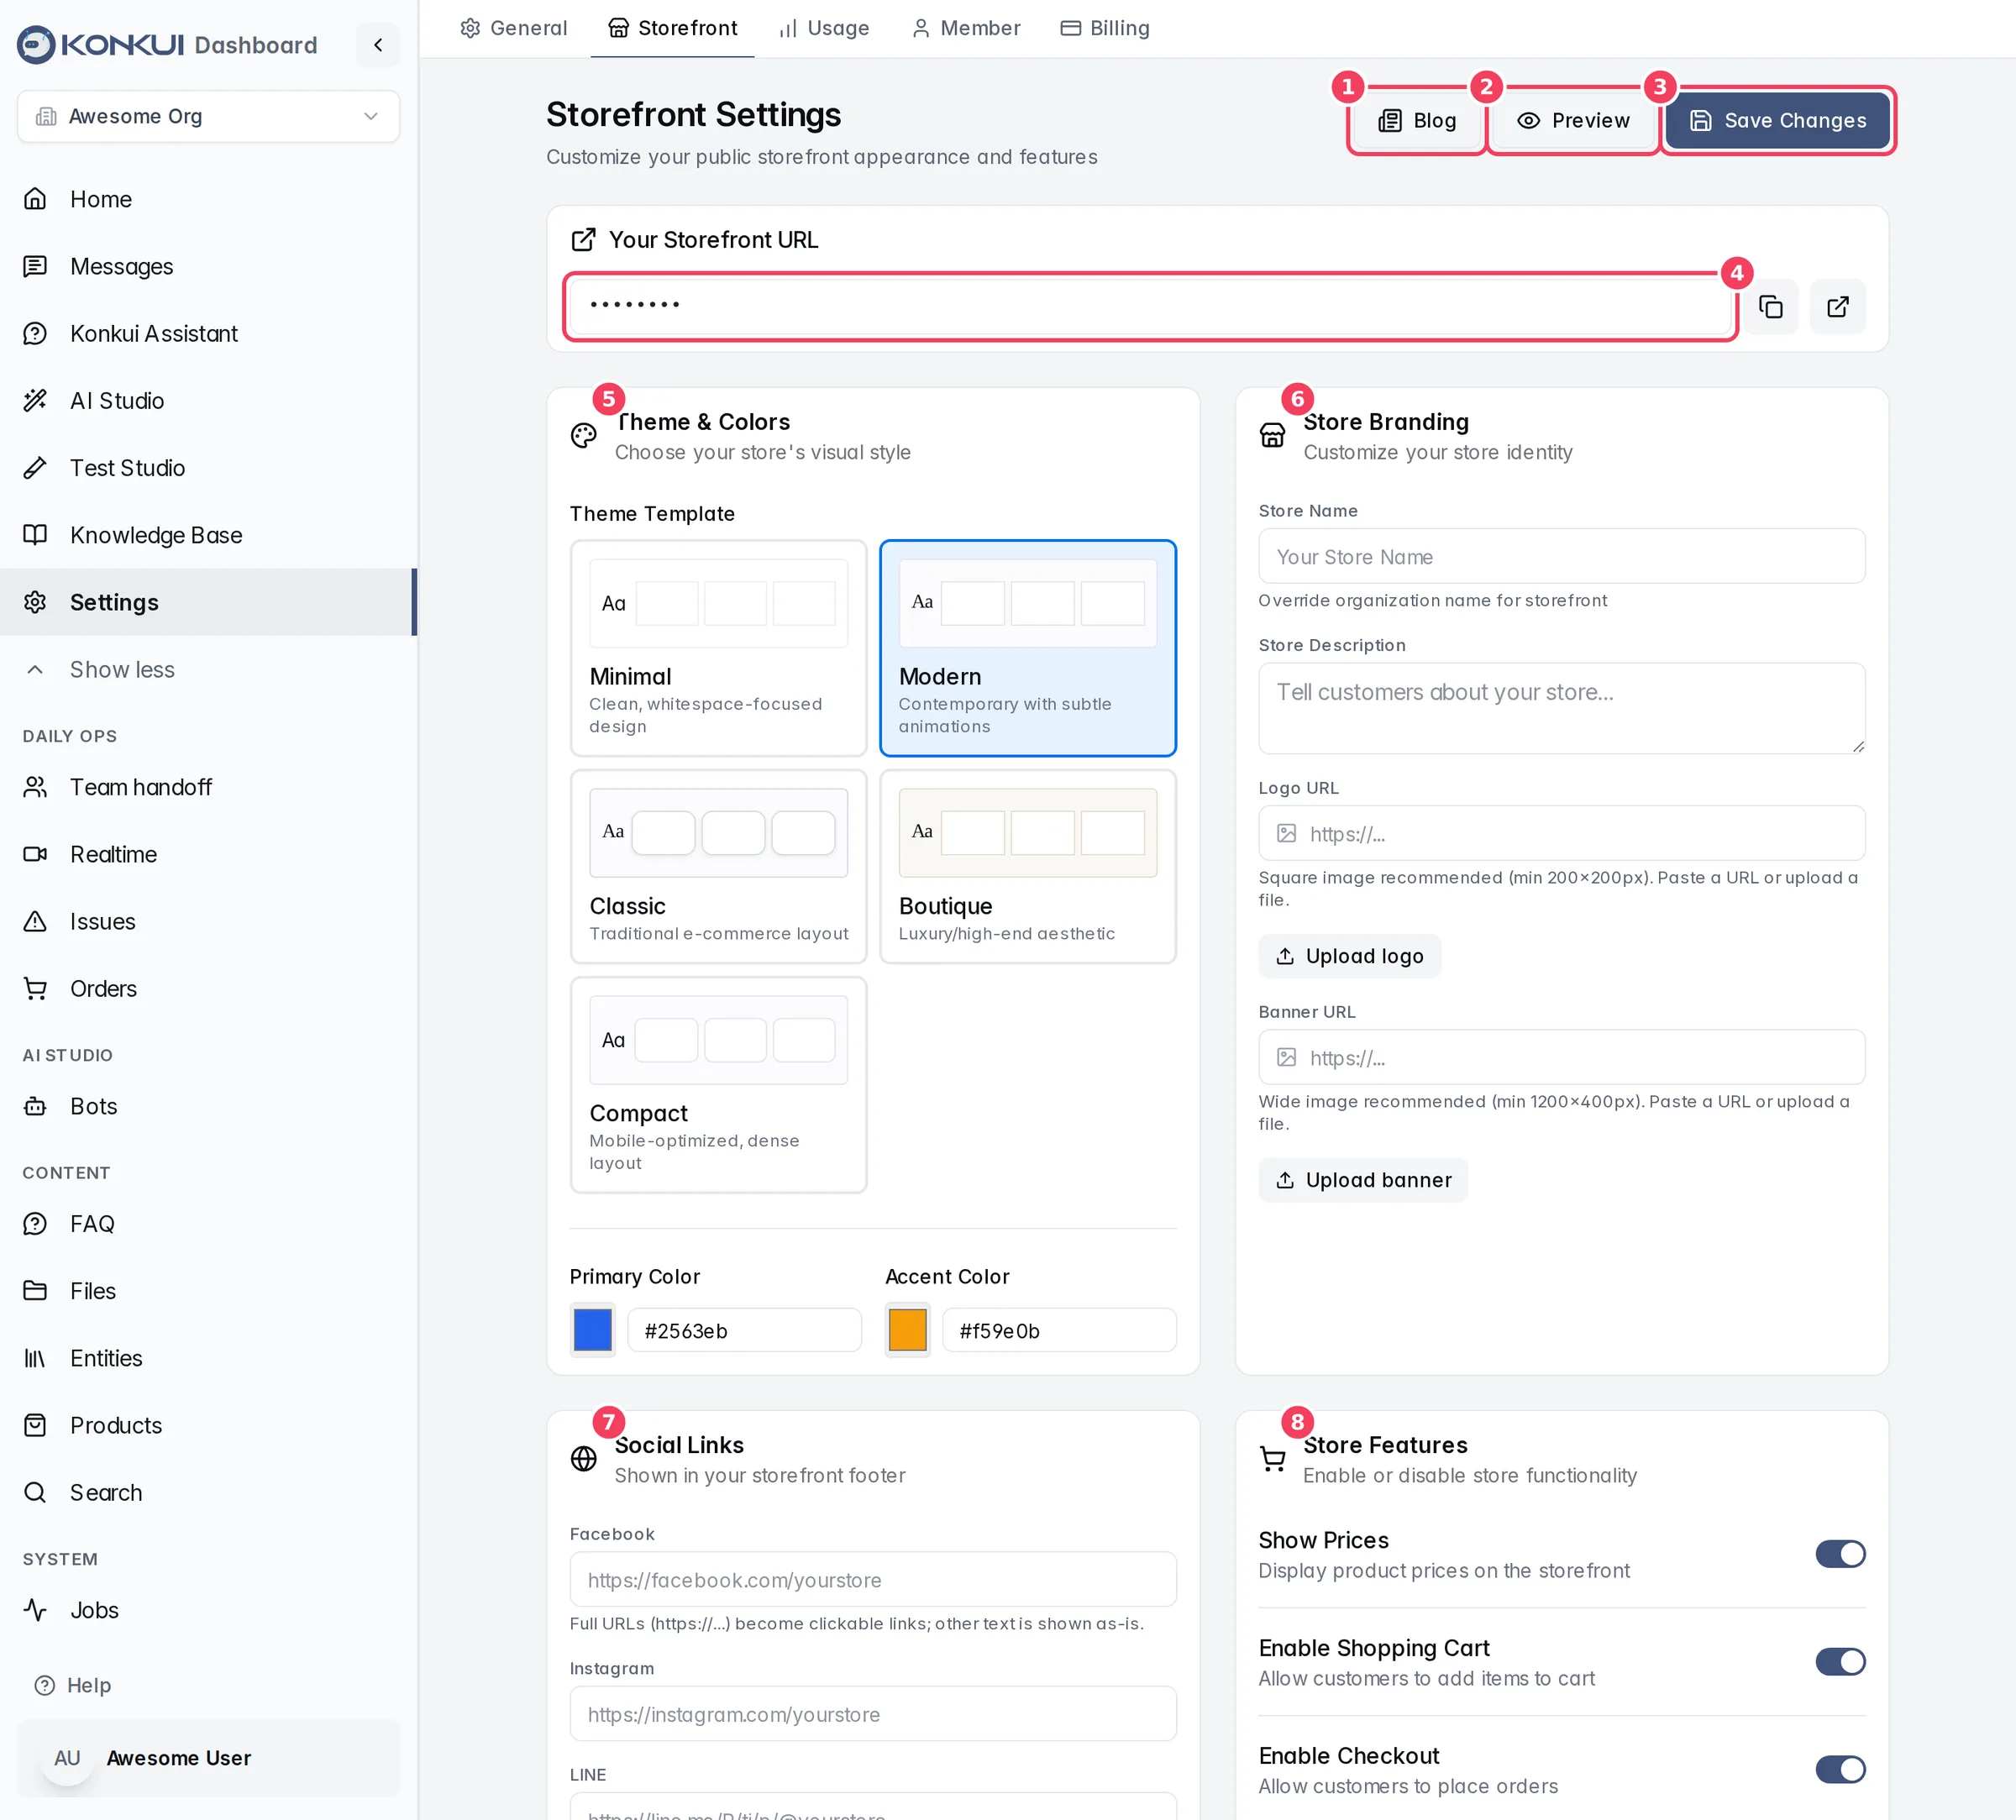
| # | Item | What it does |
|---|---|---|
| 1 | Blog | Opens the storefront blog editor. |
| 2 | Preview | Opens your live storefront in a new tab. |
| 3 | Save Changes | Saves everything on the page except Shipping & Tax, which has its own button. |
| 4 | Your Storefront URL | Your storefront's address, with buttons to copy it and open it. |
| 5 | Theme & Colors | The overall look. |
| 6 | Store Branding | Name, description, logo and banner. |
| 7 | Social Links | Links in the storefront footer. |
| 8 | Store Features | Prices, cart and checkout switches. |
Your storefront lives at https://konkui.com/shop/<your workspace ID>. Share it in your LINE rich menu, bio links or ads.
Theme & Colors
| Setting | What it does | Notes |
|---|---|---|
| Theme Template | The storefront's layout and style: Minimal (clean, lots of white space), Modern (contemporary, subtle animations), Classic (traditional e-commerce), Boutique (luxury, high-end) or Compact (dense, mobile-first). | |
| Primary Color | Your main brand color. | Pick a color or type a hex code. |
| Accent Color | A second color for highlights. |
Store Branding
| Setting | What it does | Notes |
|---|---|---|
| Store Name | The name shown on the storefront. | Leave blank to use your organization name. |
| Store Description | A short introduction to your store. | |
| Logo URL | Your logo. Paste an image URL or click Upload logo. | Square, at least 200 × 200 px. |
| Banner URL | A wide header image. Paste a URL or click Upload banner. | At least 1200 × 400 px. |
Uploads accept PNG, JPEG, GIF or WebP. A new upload appears as "save to publish" until you click Save Changes.
Social Links
Add your Facebook, Instagram, LINE, TikTok, YouTube, X (Twitter) and Website links. They appear in the storefront footer. Full URLs (starting with https://) become clickable links; anything else is shown as plain text.
Store Features
| Setting | What it does | Notes |
|---|---|---|
| Show Prices | Shows product prices on the storefront. | Turn off to use the storefront as a catalog only. |
| Enable Shopping Cart | Lets shoppers add items to a cart. | |
| Enable Checkout | Lets shoppers place orders. | Needs the shopping cart turned on. Orders appear in Orders. |
Contact Information
Contact Email and Contact Phone tell shoppers how to reach you.
Live Preview
A preview of your storefront that shows your unsaved changes exactly as customers will see them. Switch between Desktop and Mobile, or click Open in new tab.
Homepage
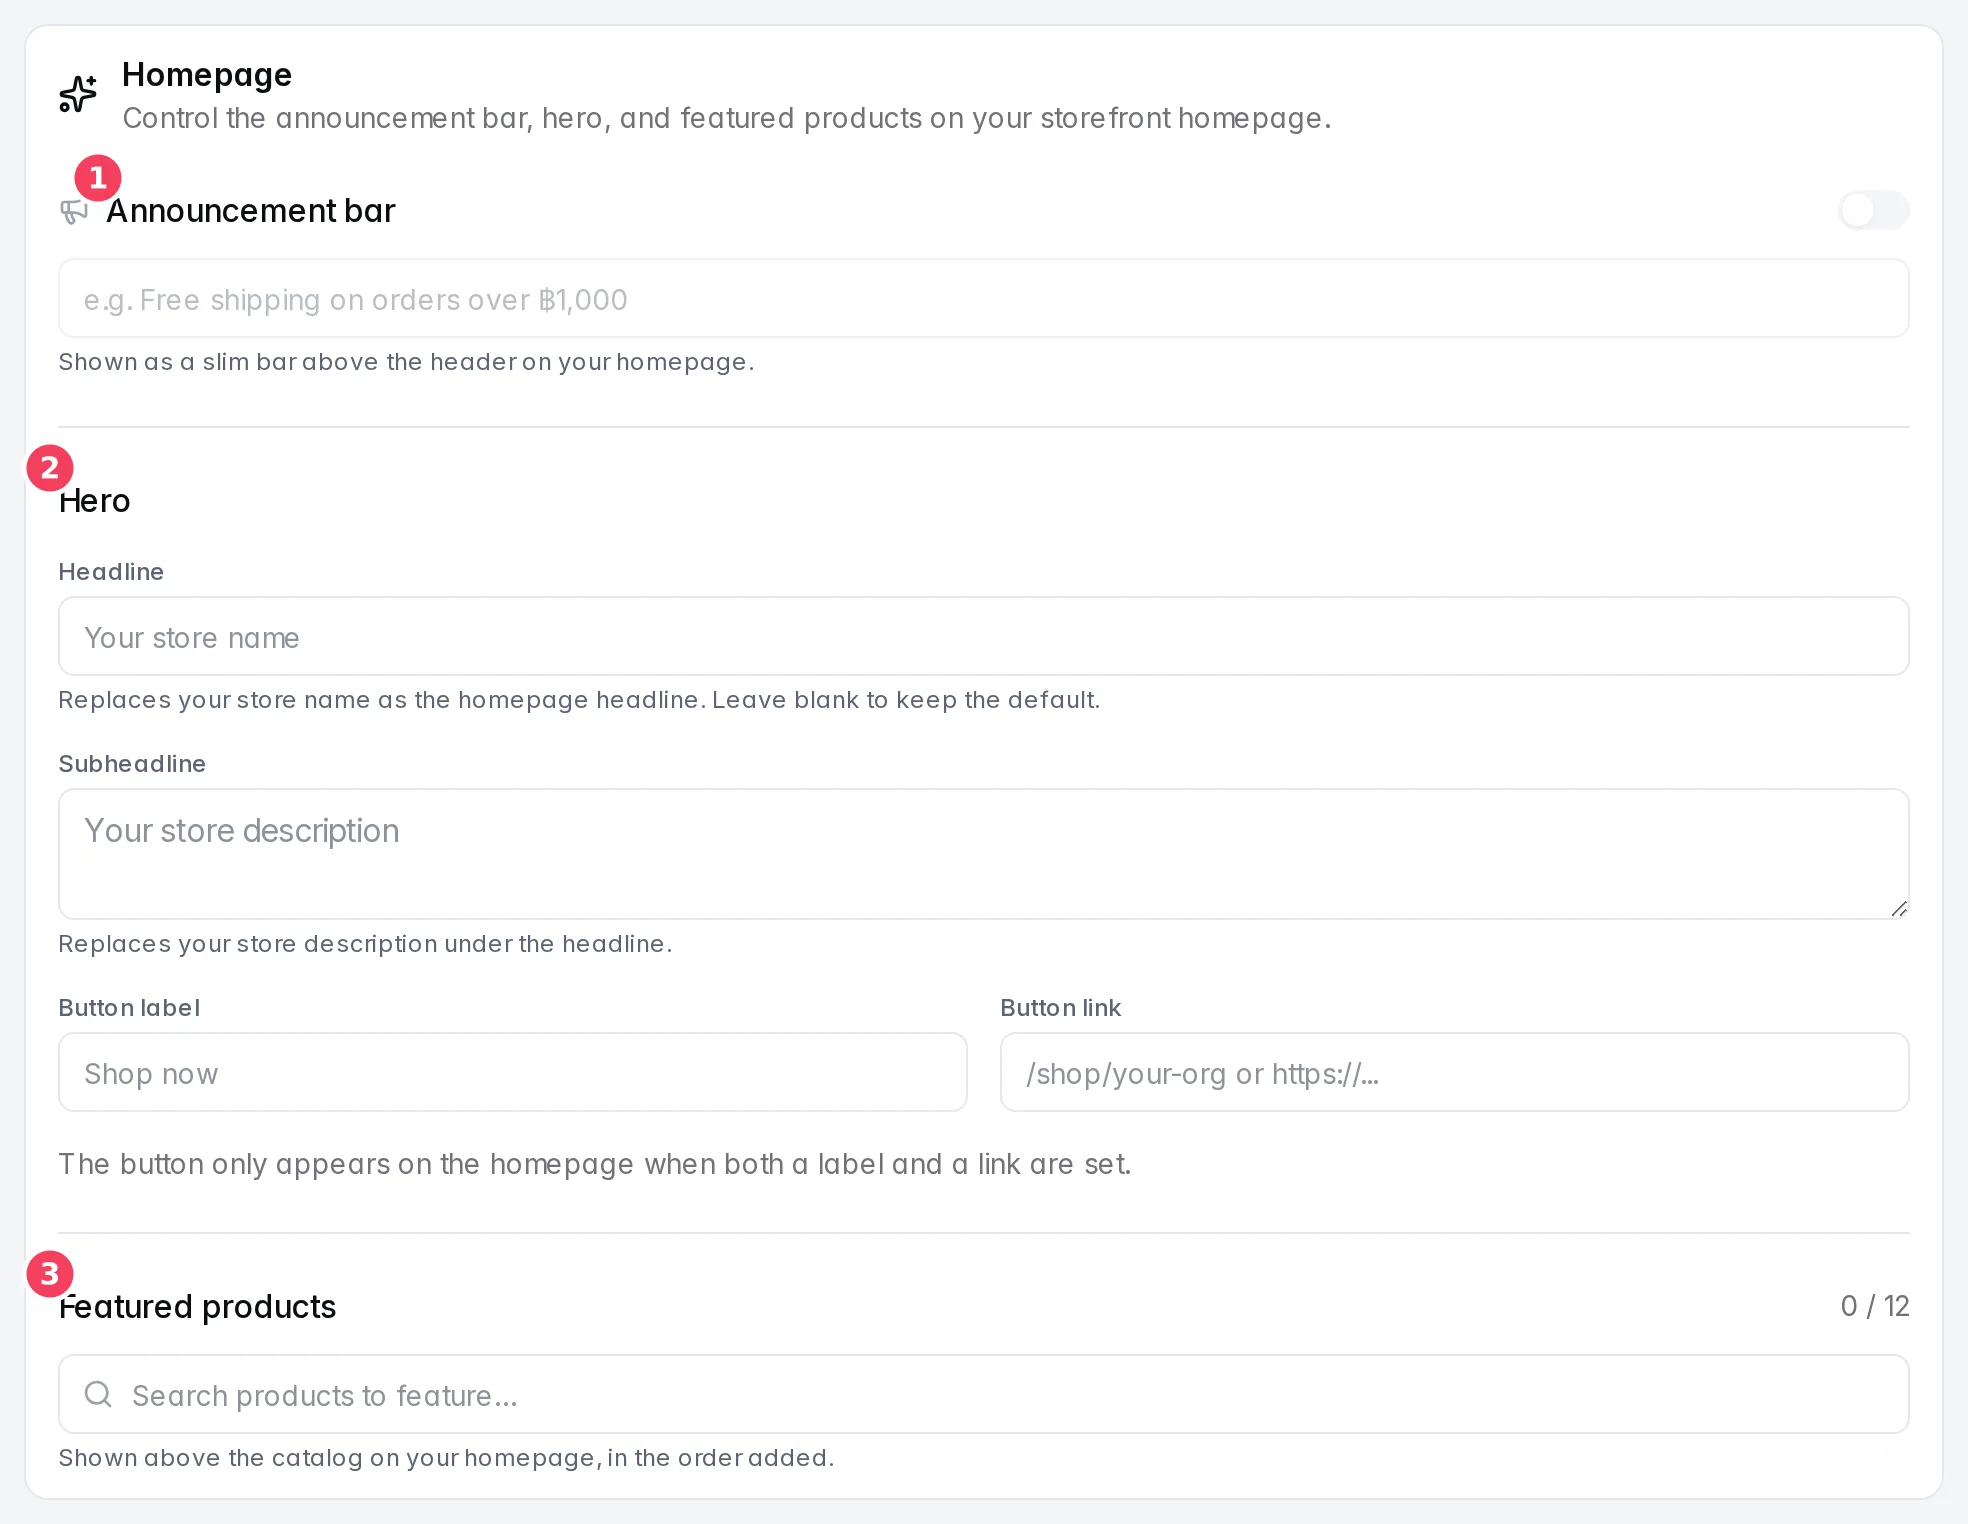
| # | Section | What it does |
|---|---|---|
| 1 | Announcement bar | A slim bar above the header, for example "Free shipping on orders over ฿1,000". Turn it on and type the text. |
| 2 | Hero | The large heading area at the top of your homepage. |
| 3 | Featured products | Products shown above the catalog, in the order you add them. Up to 12. |
| Setting | What it does | Notes |
|---|---|---|
| Headline | Replaces your store name as the homepage headline. | Leave blank to keep the default. |
| Subheadline | Replaces your store description under the headline. | |
| Button label / Button link | A call-to-action button in the hero. | The button appears only when both are set. The link must be a page path starting with / or a full https:// URL. |
| Featured products | Search your catalog and add products. | Remove one to add another once you reach 12. |
Shipping & Tax
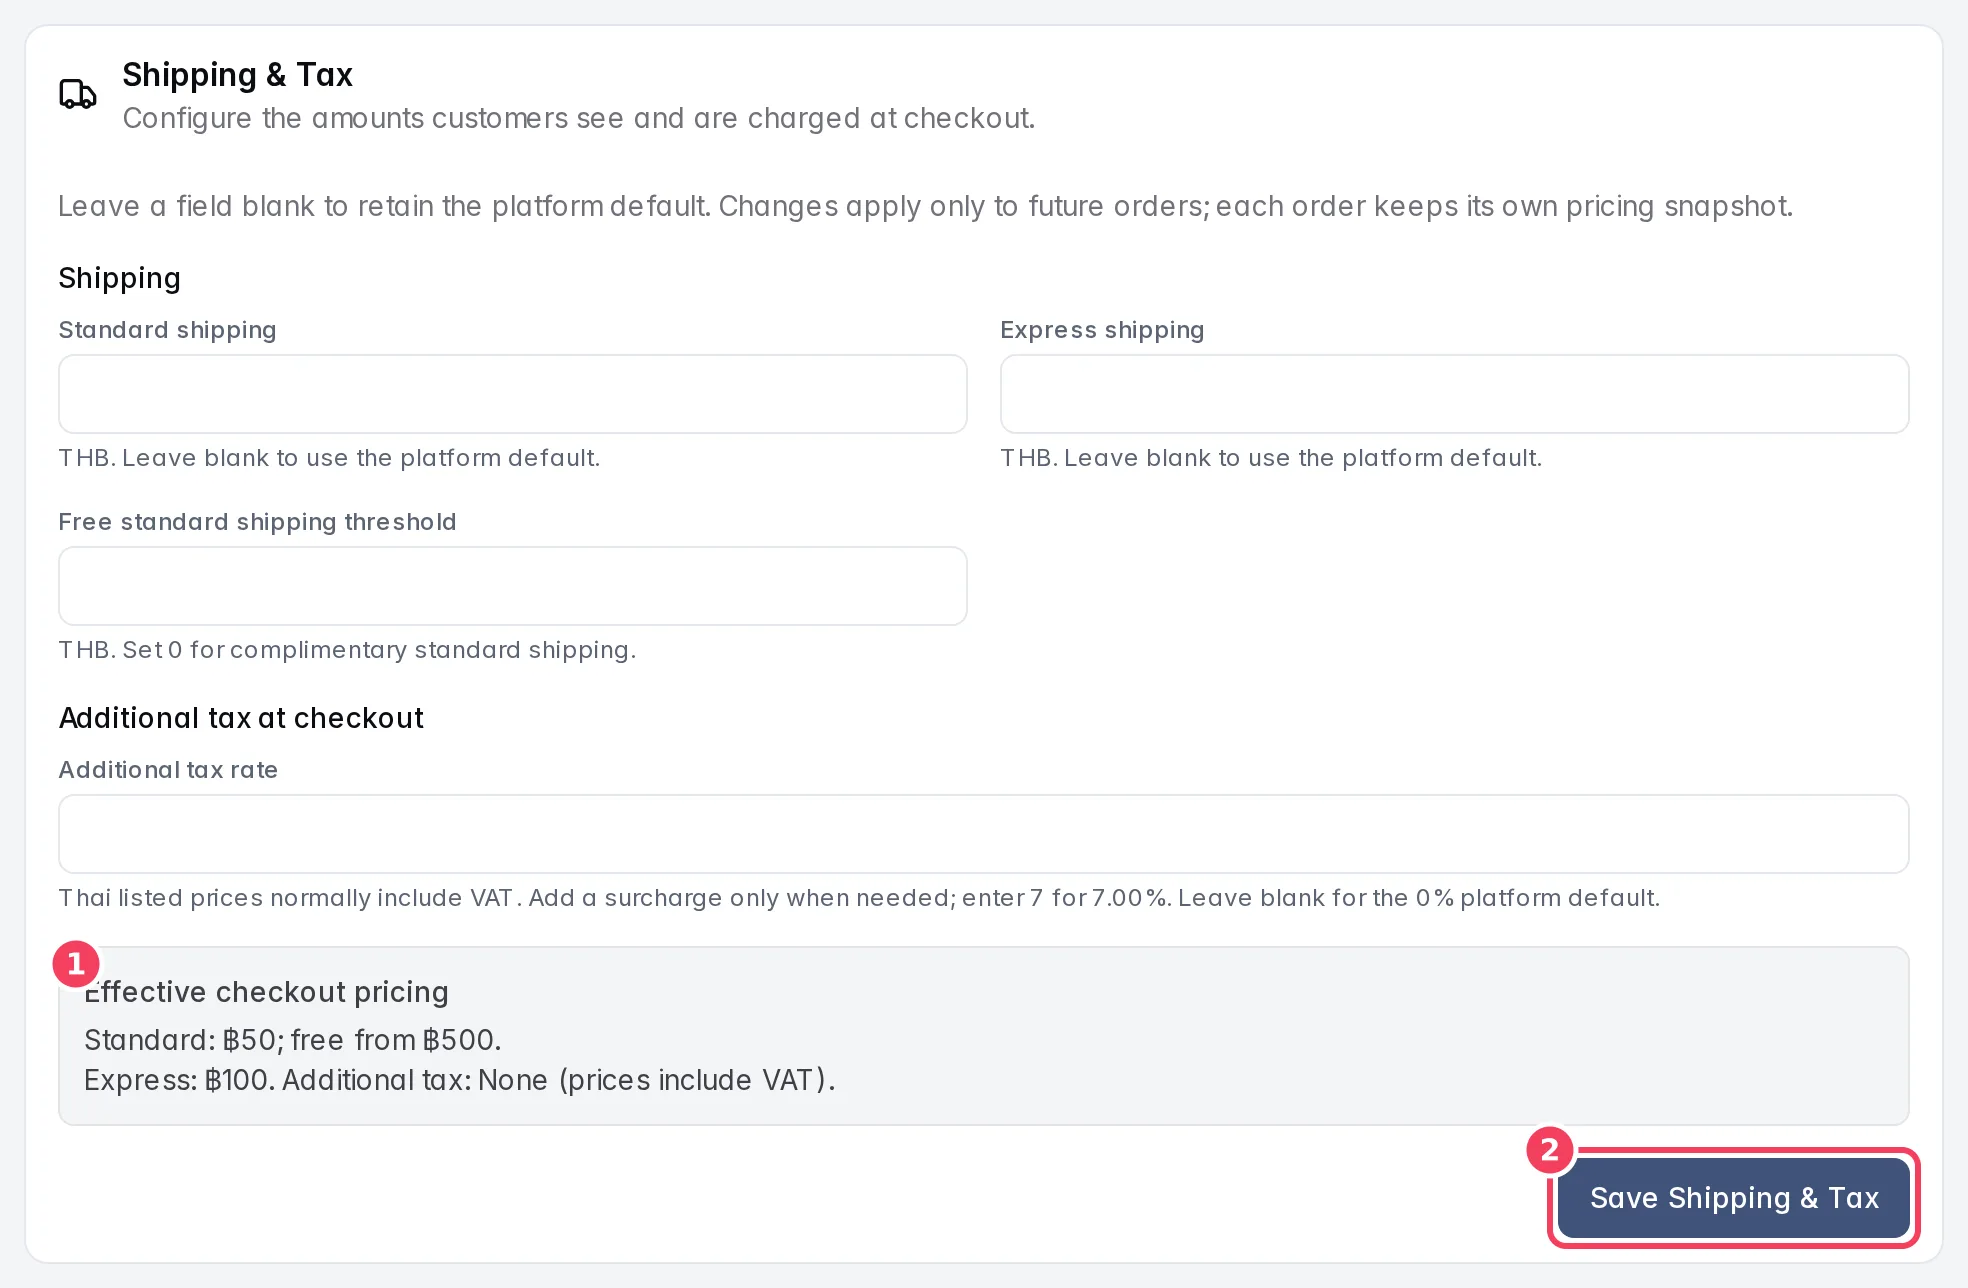
| # | Item | What it does |
|---|---|---|
| 1 | Effective checkout pricing | A summary of what checkout will actually charge with your current values. |
| 2 | Save Shipping & Tax | Saves this section. It is separate from Save Changes. |
| Setting | What it does | Notes |
|---|---|---|
| Standard shipping | The standard shipping fee, in THB. | Leave blank to use the platform default. |
| Express shipping | The express shipping fee, in THB. | Leave blank to use the platform default. |
| Free standard shipping threshold | Order total from which standard shipping is free, in THB. | Set 0 to make standard shipping always free. |
| Additional tax rate | A percentage added at checkout. | Thai prices normally include VAT, so most shops leave it blank (0%). Enter 7 for 7.00%. |
Changes apply only to future orders. Each existing order keeps the prices it was placed with.
Payment Methods
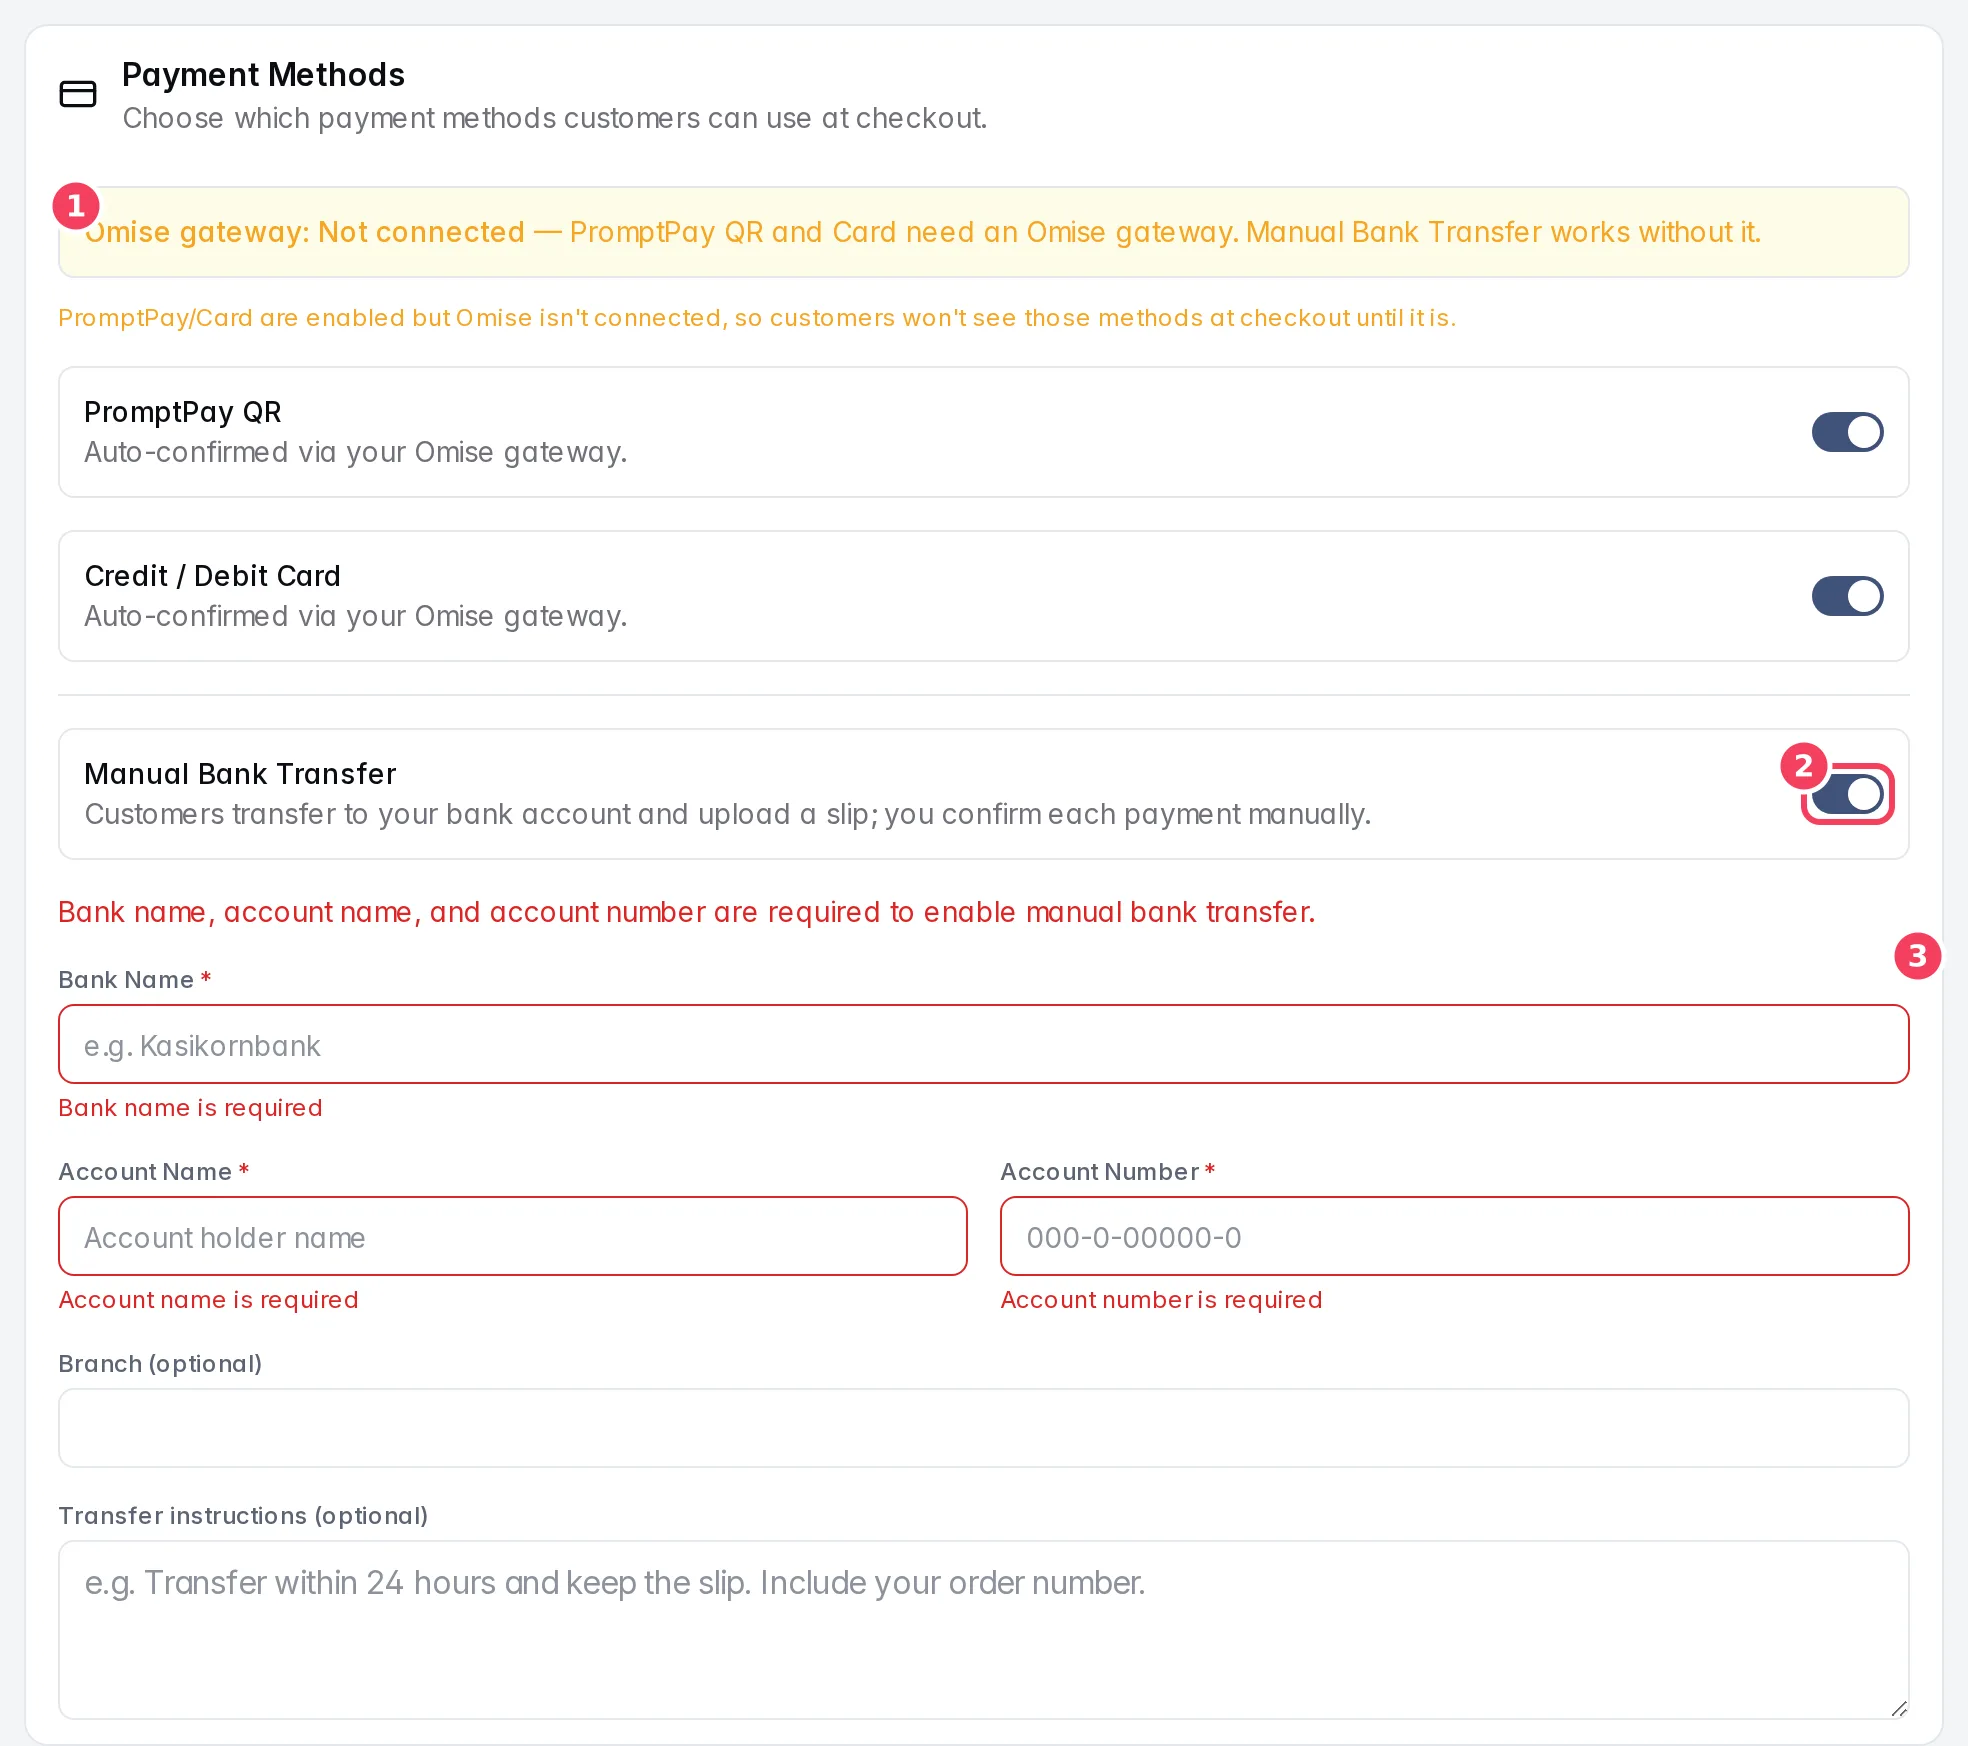
| # | Item | What it does |
|---|---|---|
| 1 | Omise gateway status | Shows whether an Omise payment gateway is connected. |
| 2 | Manual Bank Transfer | Lets customers pay by bank transfer and upload a slip. |
| 3 | Bank details | Shown when Manual Bank Transfer is on. |
| Setting | What it does | Notes |
|---|---|---|
| PromptPay QR | Customers pay by scanning a PromptPay QR code. | Needs Omise. Confirmed automatically. |
| Credit / Debit Card | Customers pay by card. | Needs Omise. Confirmed automatically. |
| Manual Bank Transfer | Customers transfer to your account and upload a slip; you confirm each payment in Orders. | Works without Omise. |
| Bank Name, Account Name, Account Number | Where customers should transfer. | Required for Manual Bank Transfer. Save Changes stays disabled until all three are filled. |
| Branch (optional) | Your bank branch. | |
| Transfer instructions (optional) | Extra instructions shown to customers, for example "Transfer within 24 hours and include your order number." |
If no payment method is on, shoppers cannot complete checkout and the page warns you. If PromptPay or card is on but Omise isn't connected, customers won't see those methods until it is.
Storefront blog
The Blog button opens the storefront blog, where you write articles for your store's Journal at /shop/<your workspace ID>/blog. Blog posts help shoppers and search engines find you.
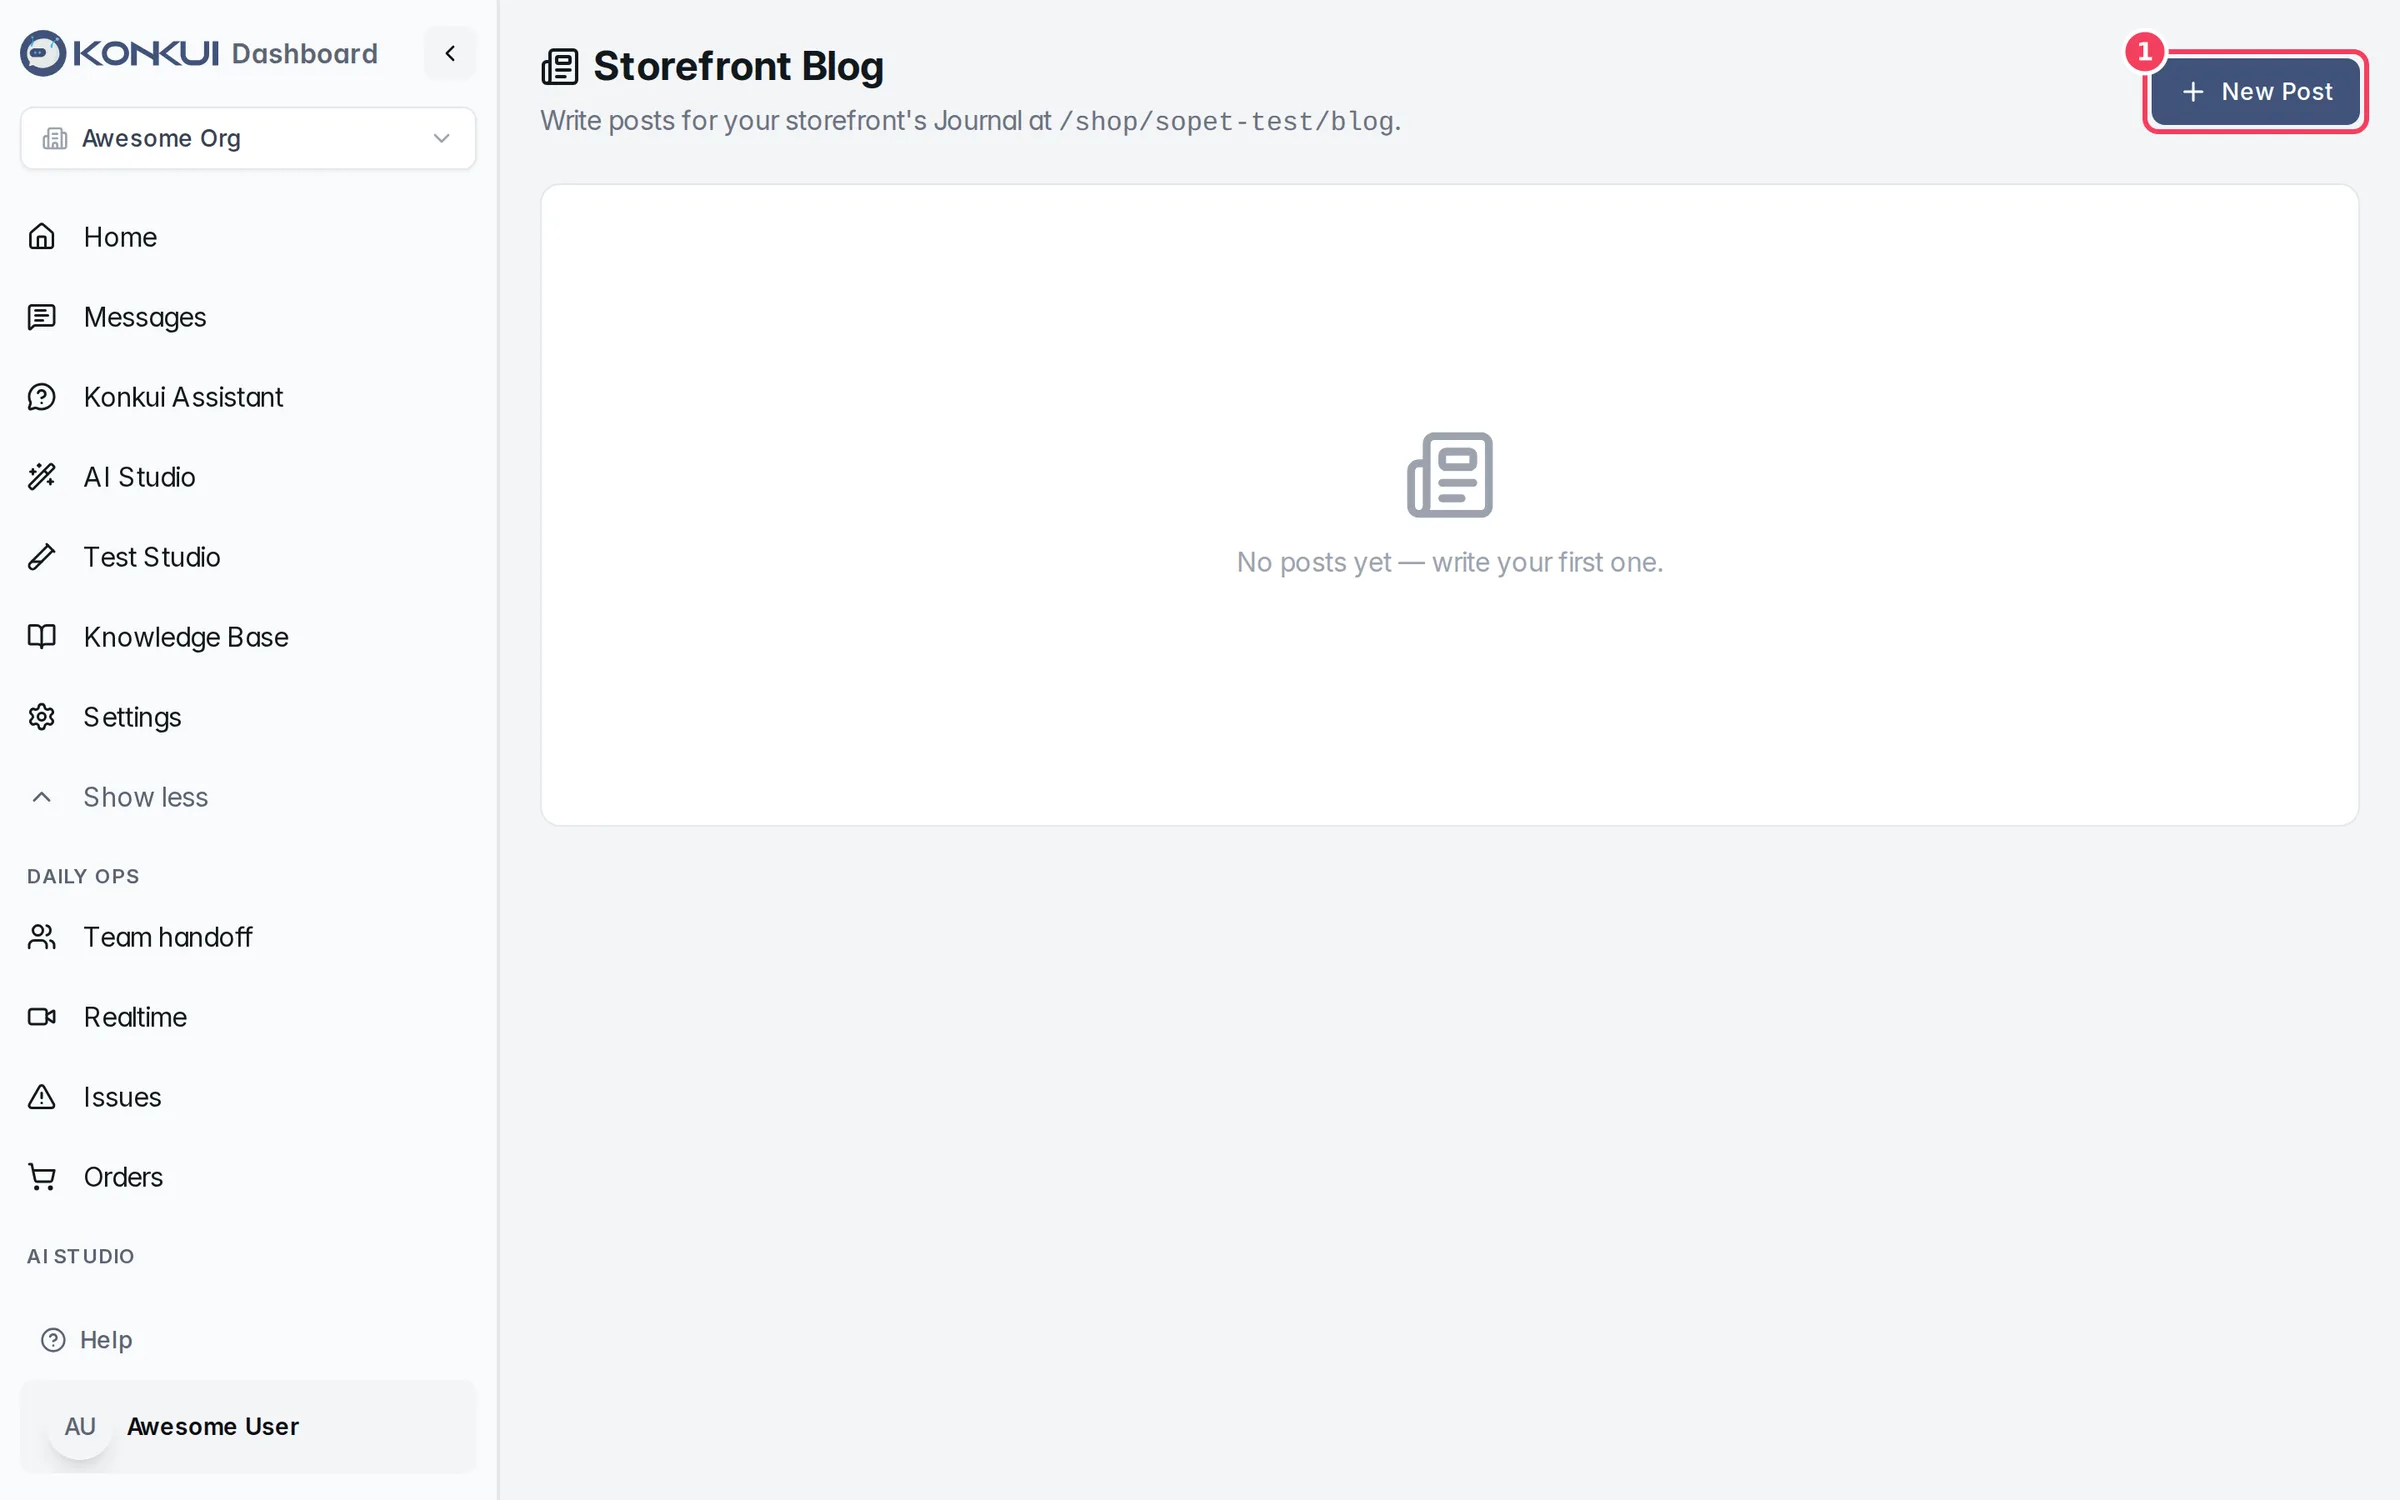
Click New Post to write one.
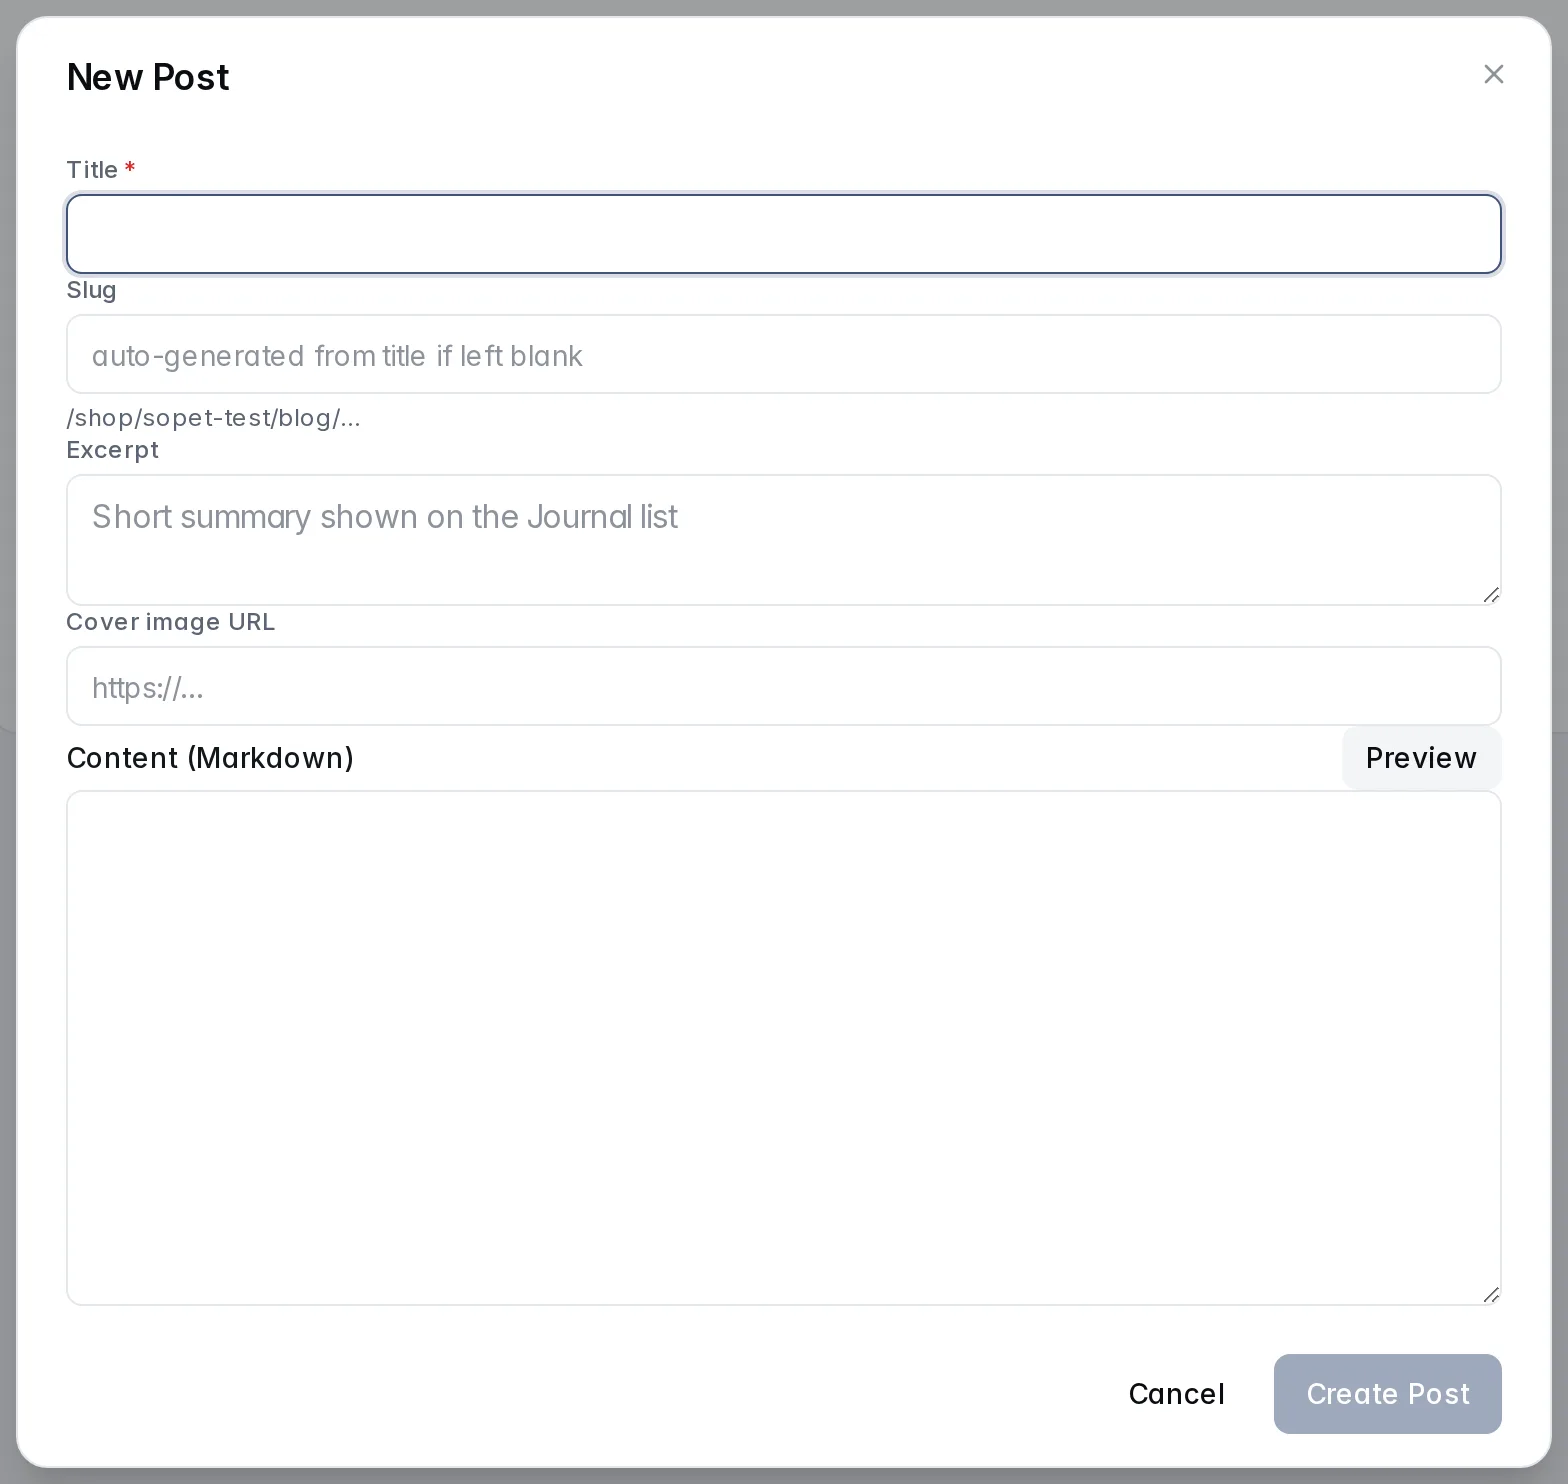
| Setting | What it does | Notes |
|---|---|---|
| Title | The post title. | Required. |
| Slug | The end of the post's web address. | Generated from the title if left blank. |
| Excerpt | A short summary shown in the Journal list. | |
| Cover image URL | An image shown with the post. | |
| Content (Markdown) | The article, written in Markdown. | Use Preview to see it formatted. |
New posts start as drafts. In the post list, each row shows the TITLE, STATUS (Draft or Published), PUBLISHED and UPDATED dates, with buttons to edit, publish or unpublish, and delete a post. Unpublishing keeps the original publish date for when you publish again.