
Browse the docs
Dashboard reference
Open in dashboardThe Member tab has two parts. Admins see Organization Member Management at the top, where they invite teammates and review who has access. Everyone sees Your availability, where you manage your own availability and the contacts your handoff alerts go to.
Your workspace has two roles:
- Admin can do everything, including inviting people, billing, channel connections and workspace settings.
- Staff can do the day-to-day work: answer customers, manage content, and test the bot. Staff do not see the member management section.
See Manage your team and roles for the full list of what only admins can do.
Where to find it
Click Settings in the sidebar, then the Member tab.
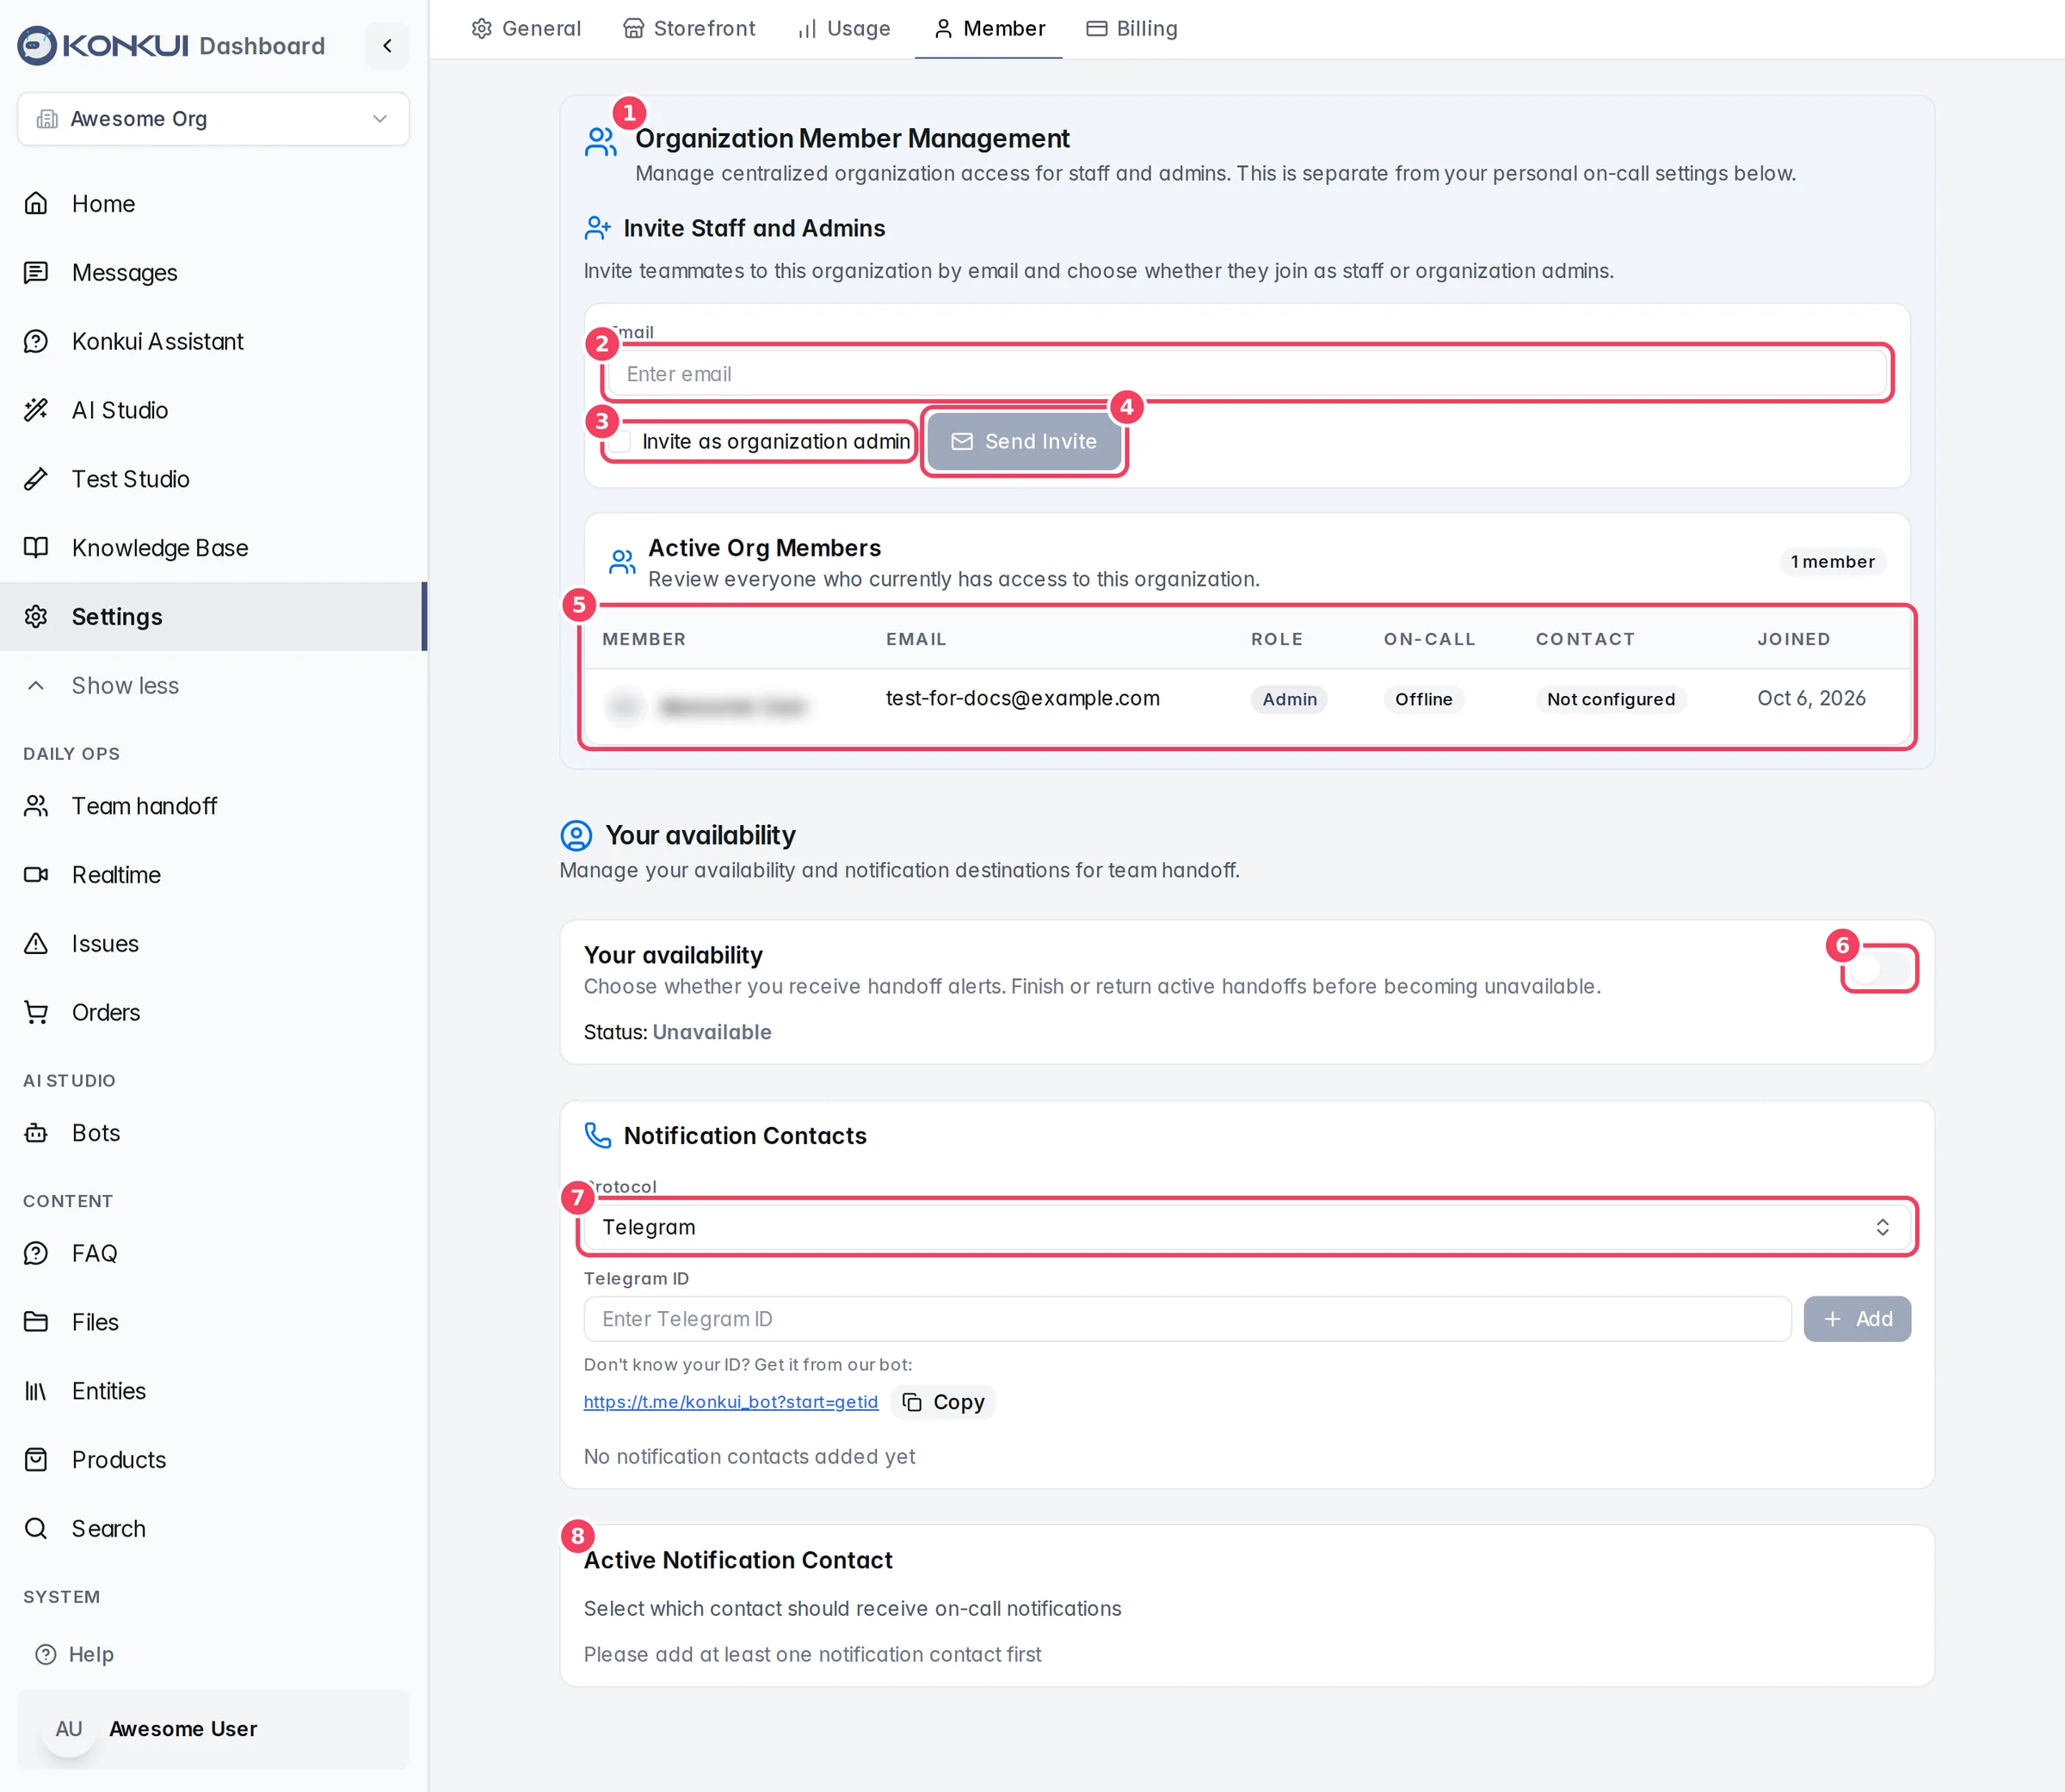
| # | Item | What it does |
|---|---|---|
| 1 | Organization Member Management | Admin-only section for inviting and reviewing teammates. |
| 2 | The email address of the person to invite. | |
| 3 | Invite as organization admin | Tick to invite the person as an Admin. Leave it unticked to invite them as Staff. |
| 4 | Send Invite | Sends the invitation. |
| 5 | Active Org Members | Everyone who currently has access. |
| 6 | Your availability switch | Turns your handoff alerts on or off. |
| 7 | Protocol | The channel of a notification contact you want to add. |
| 8 | Active Notification Contact | The contact your alerts are sent to. |
Organization Member Management
Invite Staff and Admins
Enter an email address, choose the role, and click Send Invite.
- If the person does not have a Konkui account yet, they receive an invitation email. The invitation is valid for 7 days.
- If they already have a Konkui account, they are added to your workspace right away and receive an email letting them know.
- If they are already a member, you will see an error and nothing changes.
Your plan may limit how many members a workspace can have. If you reach the limit, the invite shows an error.
Pending Invitations
Invitations that have not been accepted yet appear under Pending Invitations, with the email, role (Admin or Staff), the date sent, and when it expires. Expired invitations are marked (Expired).
| Button | What it does |
|---|---|
| Resend | Sends the invitation again with a fresh link. If the person has created a Konkui account since, they are added to the workspace directly instead. |
| Revoke | Cancels the invitation so its link no longer works. |
Active Org Members
| Column | What it shows |
|---|---|
| MEMBER | Name and profile picture. |
| The email they sign in with. | |
| ROLE | Admin or Staff. |
| ON-CALL | Online if they are available for handoff alerts, otherwise Offline. |
| CONTACT | Configured if they have chosen an alert destination, otherwise Not configured. |
| JOINED | When they joined the workspace. |
Use ON-CALL and CONTACT together to check your coverage: a teammate who is Online but Not configured will not receive any alerts.
Your availability
Everyone can manage their own availability here. It is the same setting as the switch at the top of Messages and the alert setup on Team handoff.
| Setting | What it does | Notes |
|---|---|---|
| Your availability | Switch on to be Available for handoff alerts and ordinary assignments; off for Unavailable. | Finish or return any conversation you have taken over before you switch off. Ordinary assignments are released to the team when you switch off. |
Notification Contacts
Add the places your alerts can go. You can keep several contacts and choose one as active.
| Setting | What it does | Notes |
|---|---|---|
| Protocol | Telegram, SMS or LINE. | The fields below change to match. |
| Country | The dialling code for SMS. | SMS only. Thailand (+66) is selected by default. |
| Telegram ID / Phone Number / LINE User ID | The contact itself. | Telegram: get your ID from the Konkui bot link shown under the field (Copy copies the link). LINE: send /admin_getstart to your organization's LINE bot to get your LINE ID. SMS: the number without the country code. |
| Add | Saves the contact. | You can also press Enter. Your first contact becomes the active one. Duplicates are ignored. |
Saved contacts appear under Your notification contacts: with their channel. Click × next to a contact to remove it. Removing the active contact leaves you with no active contact until you pick another.
Active Notification Contact
Choose which saved contact receives your alerts. The current choice is shown as Currently active:. If you have no contacts yet, you will see Please add at least one notification contact first.