
Browse the docs
Guides
Open in dashboardKonkui can do more than answer questions: with your catalog loaded, the AI recommends products, and your Konkui storefront lets customers order and pay. This guide takes you from an empty catalog to your first confirmed order.
You will:
- Add your products.
- Set up the storefront and its payment methods.
- Handle orders and confirm bank-transfer payments.
Before you begin
- Any workspace member can do most of this. Only workspace admins can change Shipping & Tax.
- If you sell on Shopify or LINE Shop, have your store credentials ready (see Connect your channels).
- If you will accept bank transfers, have your bank name, account name and account number ready.
Step 1: Add your products
Open Products. While your catalog is empty, the page offers a card for each way to add products.
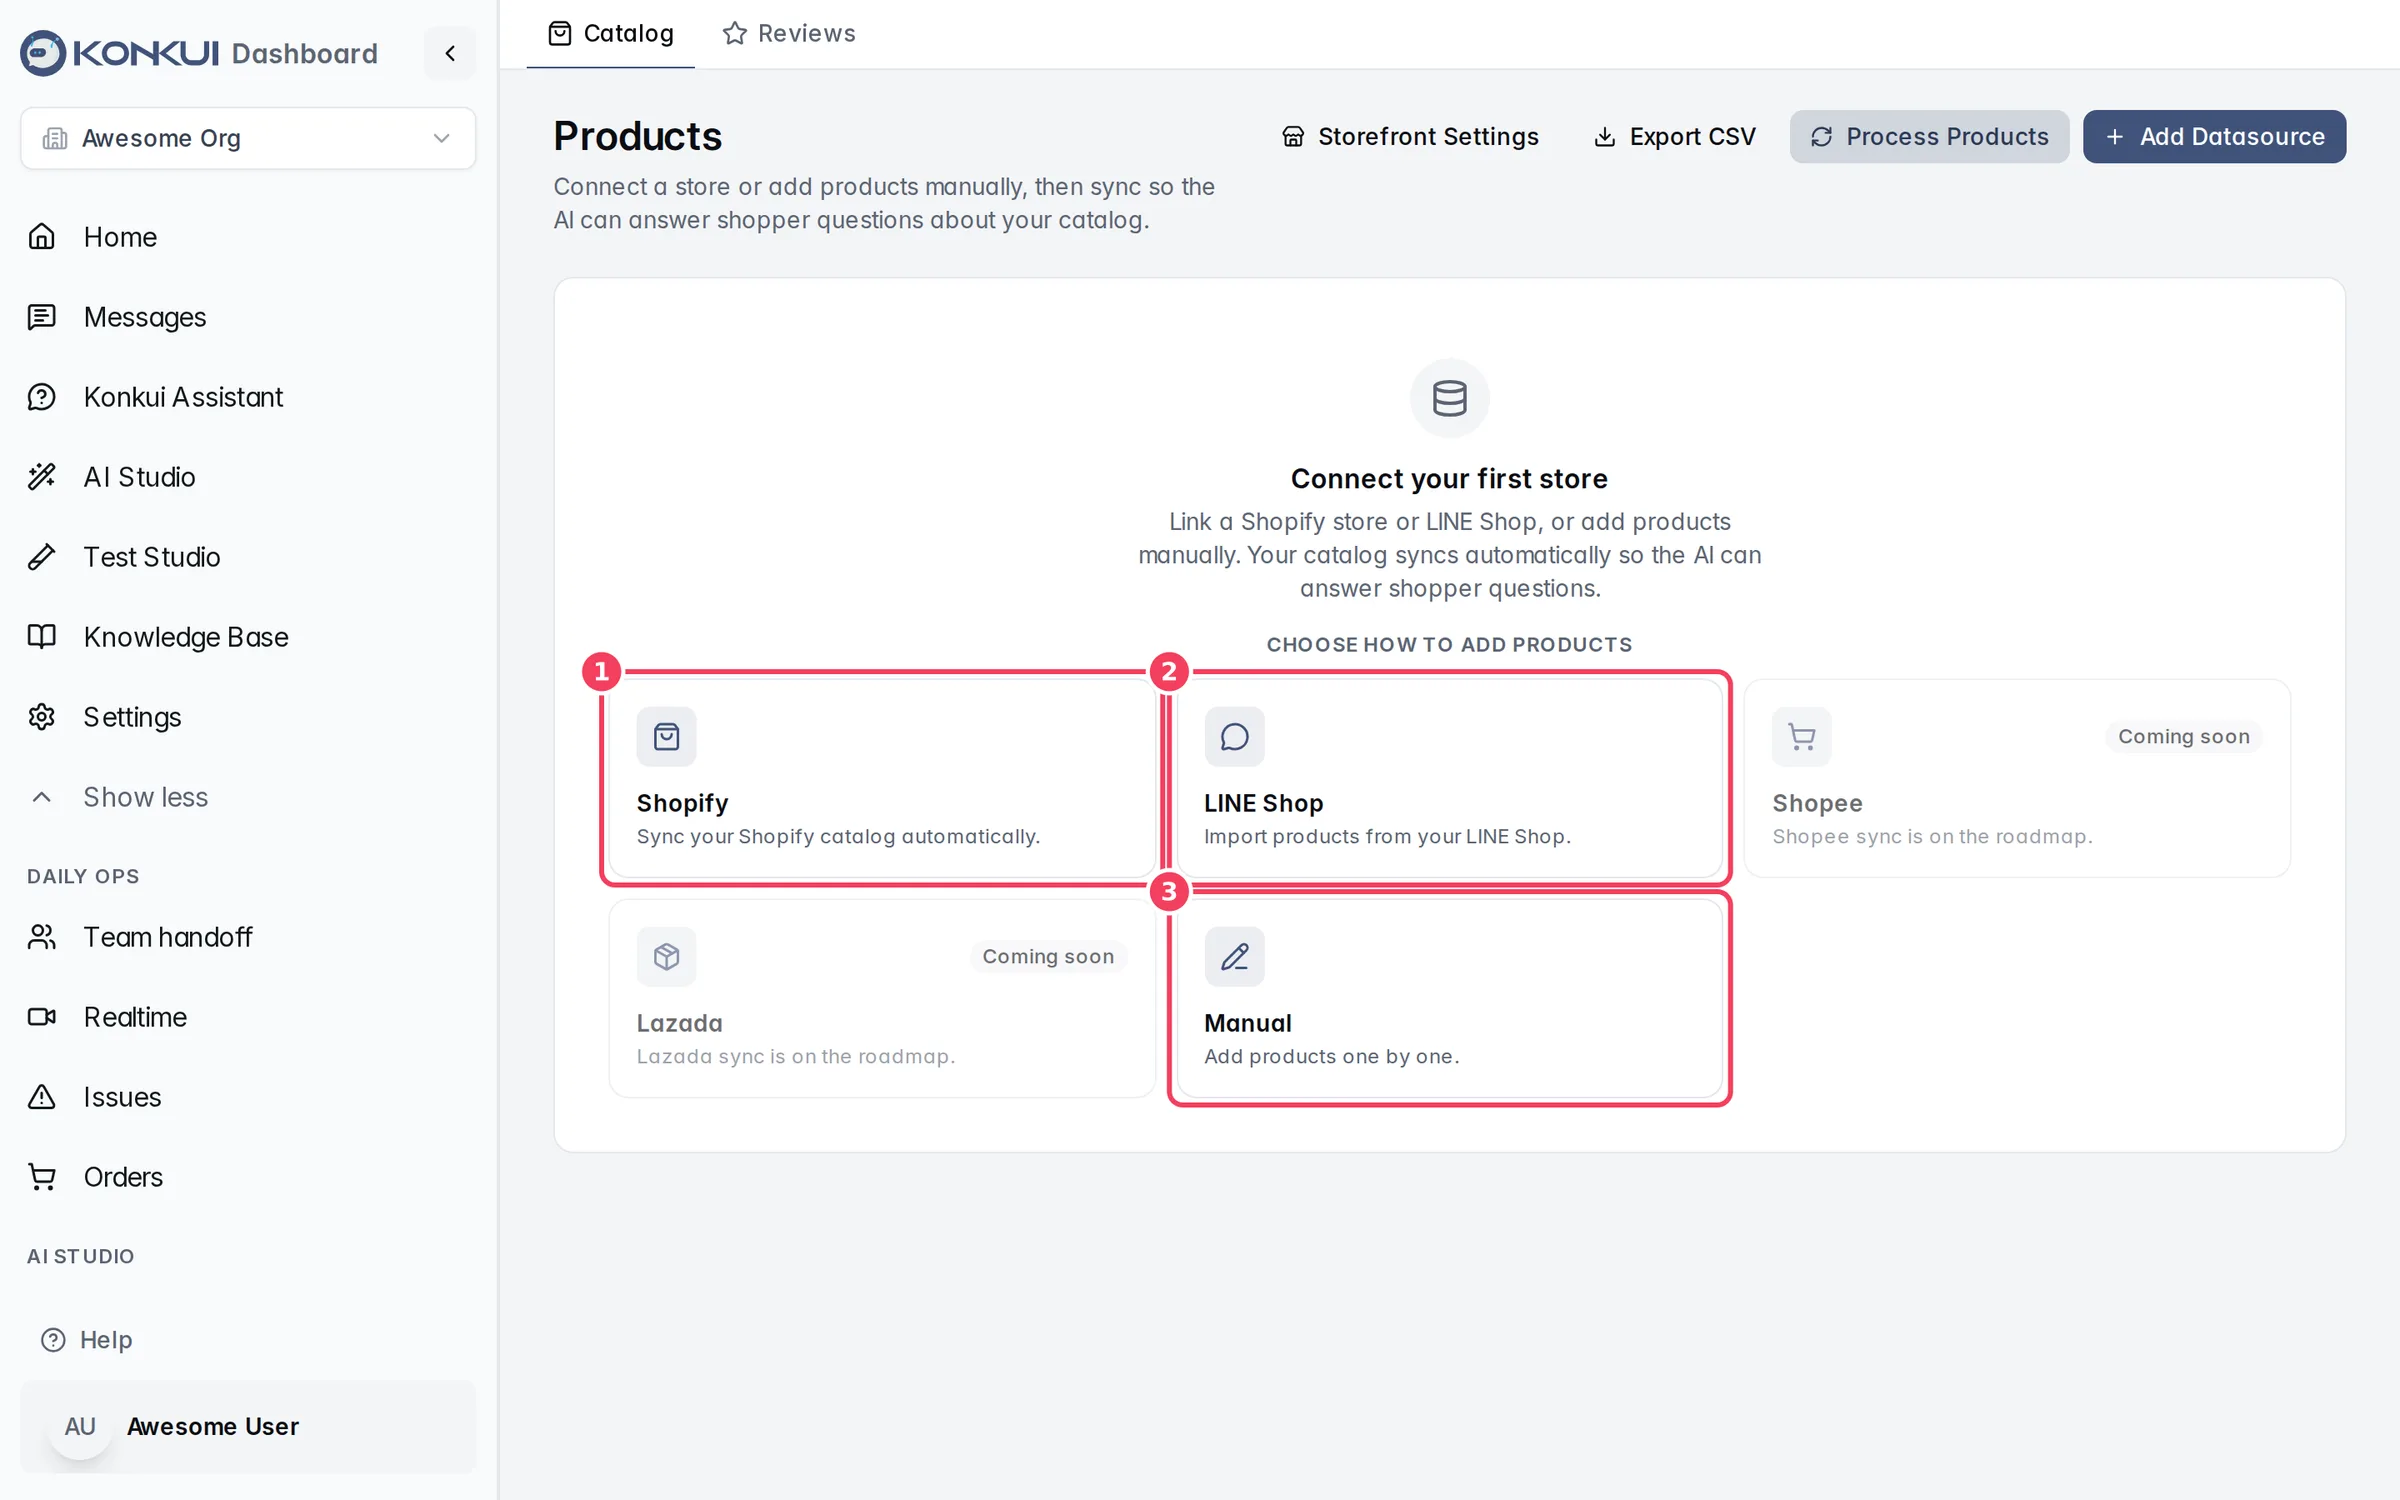
| # | Option | When to use it |
|---|---|---|
| 1 | Shopify | Your products already live in Shopify. Konkui imports and re-syncs them. |
| 2 | LINE Shop | Your products already live in LINE Shop. |
| 3 | Manual | You don't use either store, or you want to add a few extra products by hand. |
Import from Shopify or LINE Shop
- Click the Shopify or LINE Shop card.
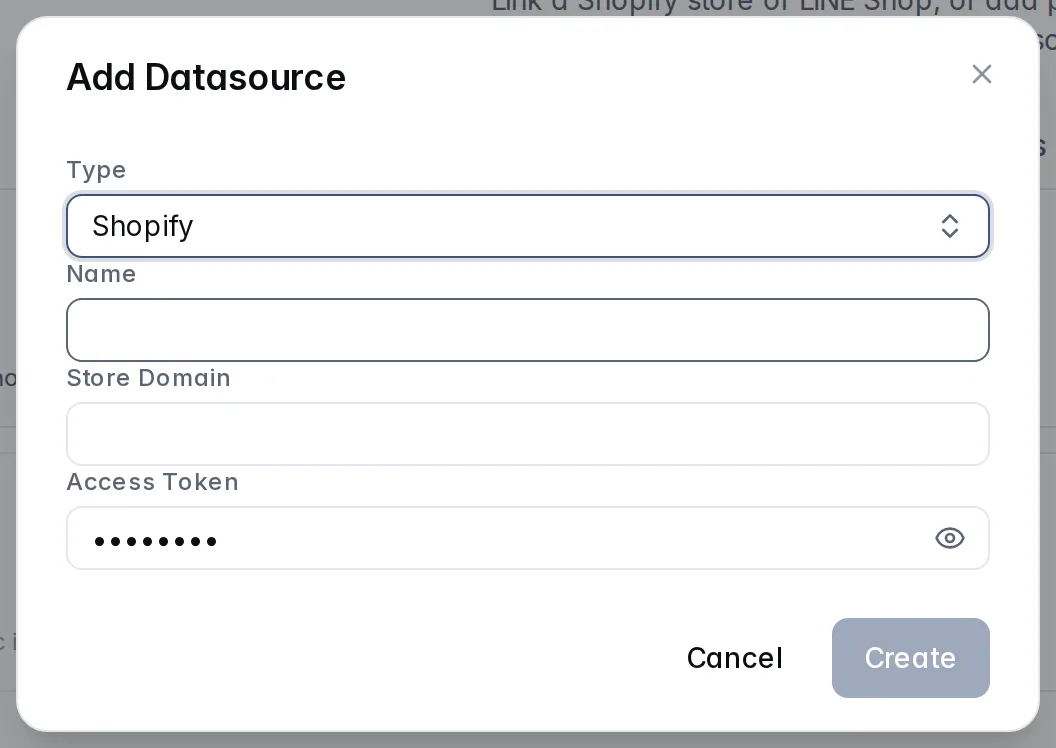
- Give the datasource a Name, fill in the credentials and click Create:
- Shopify: Store Domain (your
.myshopify.comdomain) and Access Token (the Storefront access token from Shopify's Headless channel). - LINE Shop: API Key, and optionally your OA Basic ID.
- Shopify: Store Domain (your
- Click the sync icon on the new datasource card. A progress bar shows the import, then indexing and tagging so the AI can search your products.
Run the sync again whenever your store's products change. Products imported from a store are updated from that store on every sync, so edit them there.
Add products by hand
- Click the Manual card, name the list (for example "In-store items") and click Create.
- Click Add Product, fill in the Title, Description and Status, add an image, and click Create.
- Open the product and click Add Variant to set the Price, Inventory and SKU. Customers add variants to their cart, so every product you sell needs at least one.
There is no CSV import. If you have many products, importing from Shopify or LINE Shop is the fastest route.
Make products easy for the AI to sell
- Set products you want to sell to Active. Only active products appear on the storefront.
- Give your best sellers a Sale Priority (1 is the highest) so the AI recommends them first.
- Check the Tags on important products. Good tags help the AI match products to what customers ask for.
- After editing many products by hand, click Process Products and start processing so the AI picks up the changes.
See Products for every field.
Step 2: Set up your storefront
Open Settings › Storefront.
- Look and feel: choose a Theme Template, your Primary Color and Accent Color, and add your logo and banner under Store Branding.
- Store Features: make sure Show Prices, Enable Shopping Cart and Enable Checkout are on. Checkout needs the cart.
- Contact Information and Social Links: add how customers can reach you.
- Optional: under Homepage, add an Announcement bar, a Hero headline with a button, and up to 12 Featured products.
- Check everything in Live Preview, then click Save Changes.
Set shipping and tax
Admins can set Standard shipping, Express shipping, a Free standard shipping threshold and an Additional tax rate under Shipping & Tax. Leave fields blank to use the platform defaults; the Effective checkout pricing box shows what customers will be charged. Click Save Shipping & Tax.
Choose payment methods
Under Payment Methods:
- Manual Bank Transfer works immediately. Turn it on and fill in Bank Name, Account Name and Account Number, plus optional Transfer instructions. Customers transfer and upload their slip; you confirm each payment.
- PromptPay QR and Credit / Debit Card are confirmed automatically, but need an Omise payment gateway. If the status reads Not connected, contact Konkui support to set Omise up.
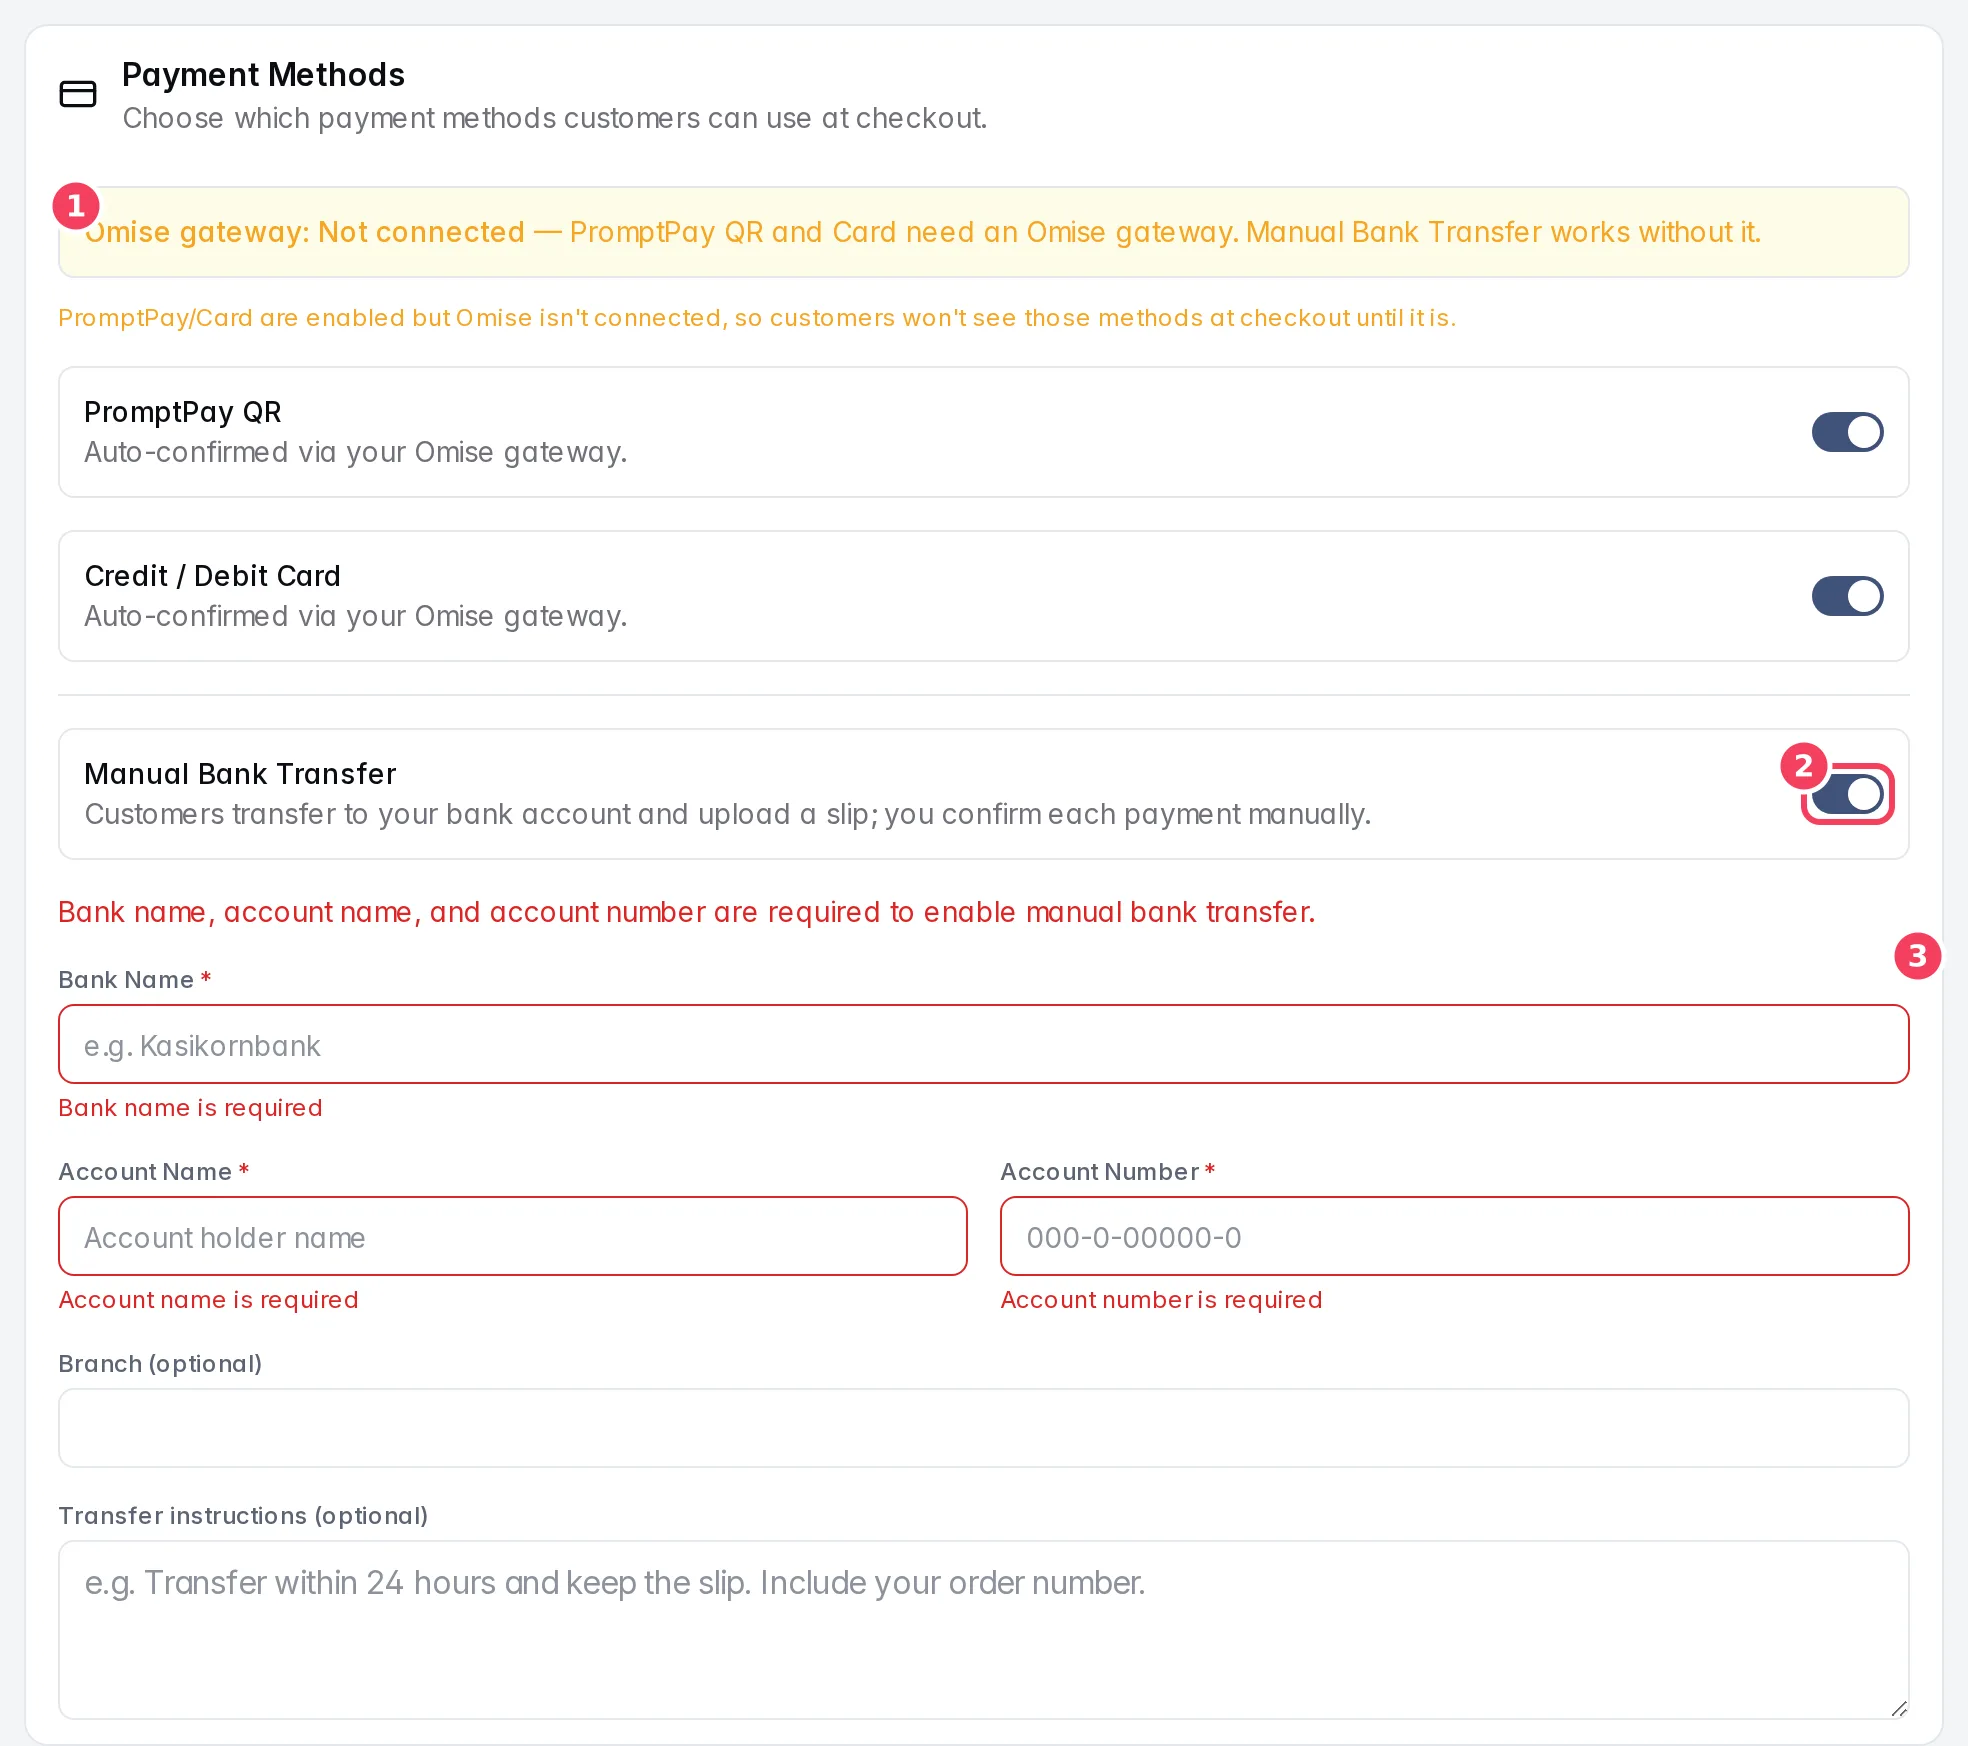
Click Save Changes. It stays disabled until the bank details are complete.
Share your storefront
Copy the address from Your Storefront URL at the top of the page. It looks like https://konkui.com/shop/<your workspace ID>. Add it to your LINE rich menu (see Build a LINE rich menu and welcome messages), your social profiles and your ads.
Step 3: Handle orders
New orders appear in Orders.
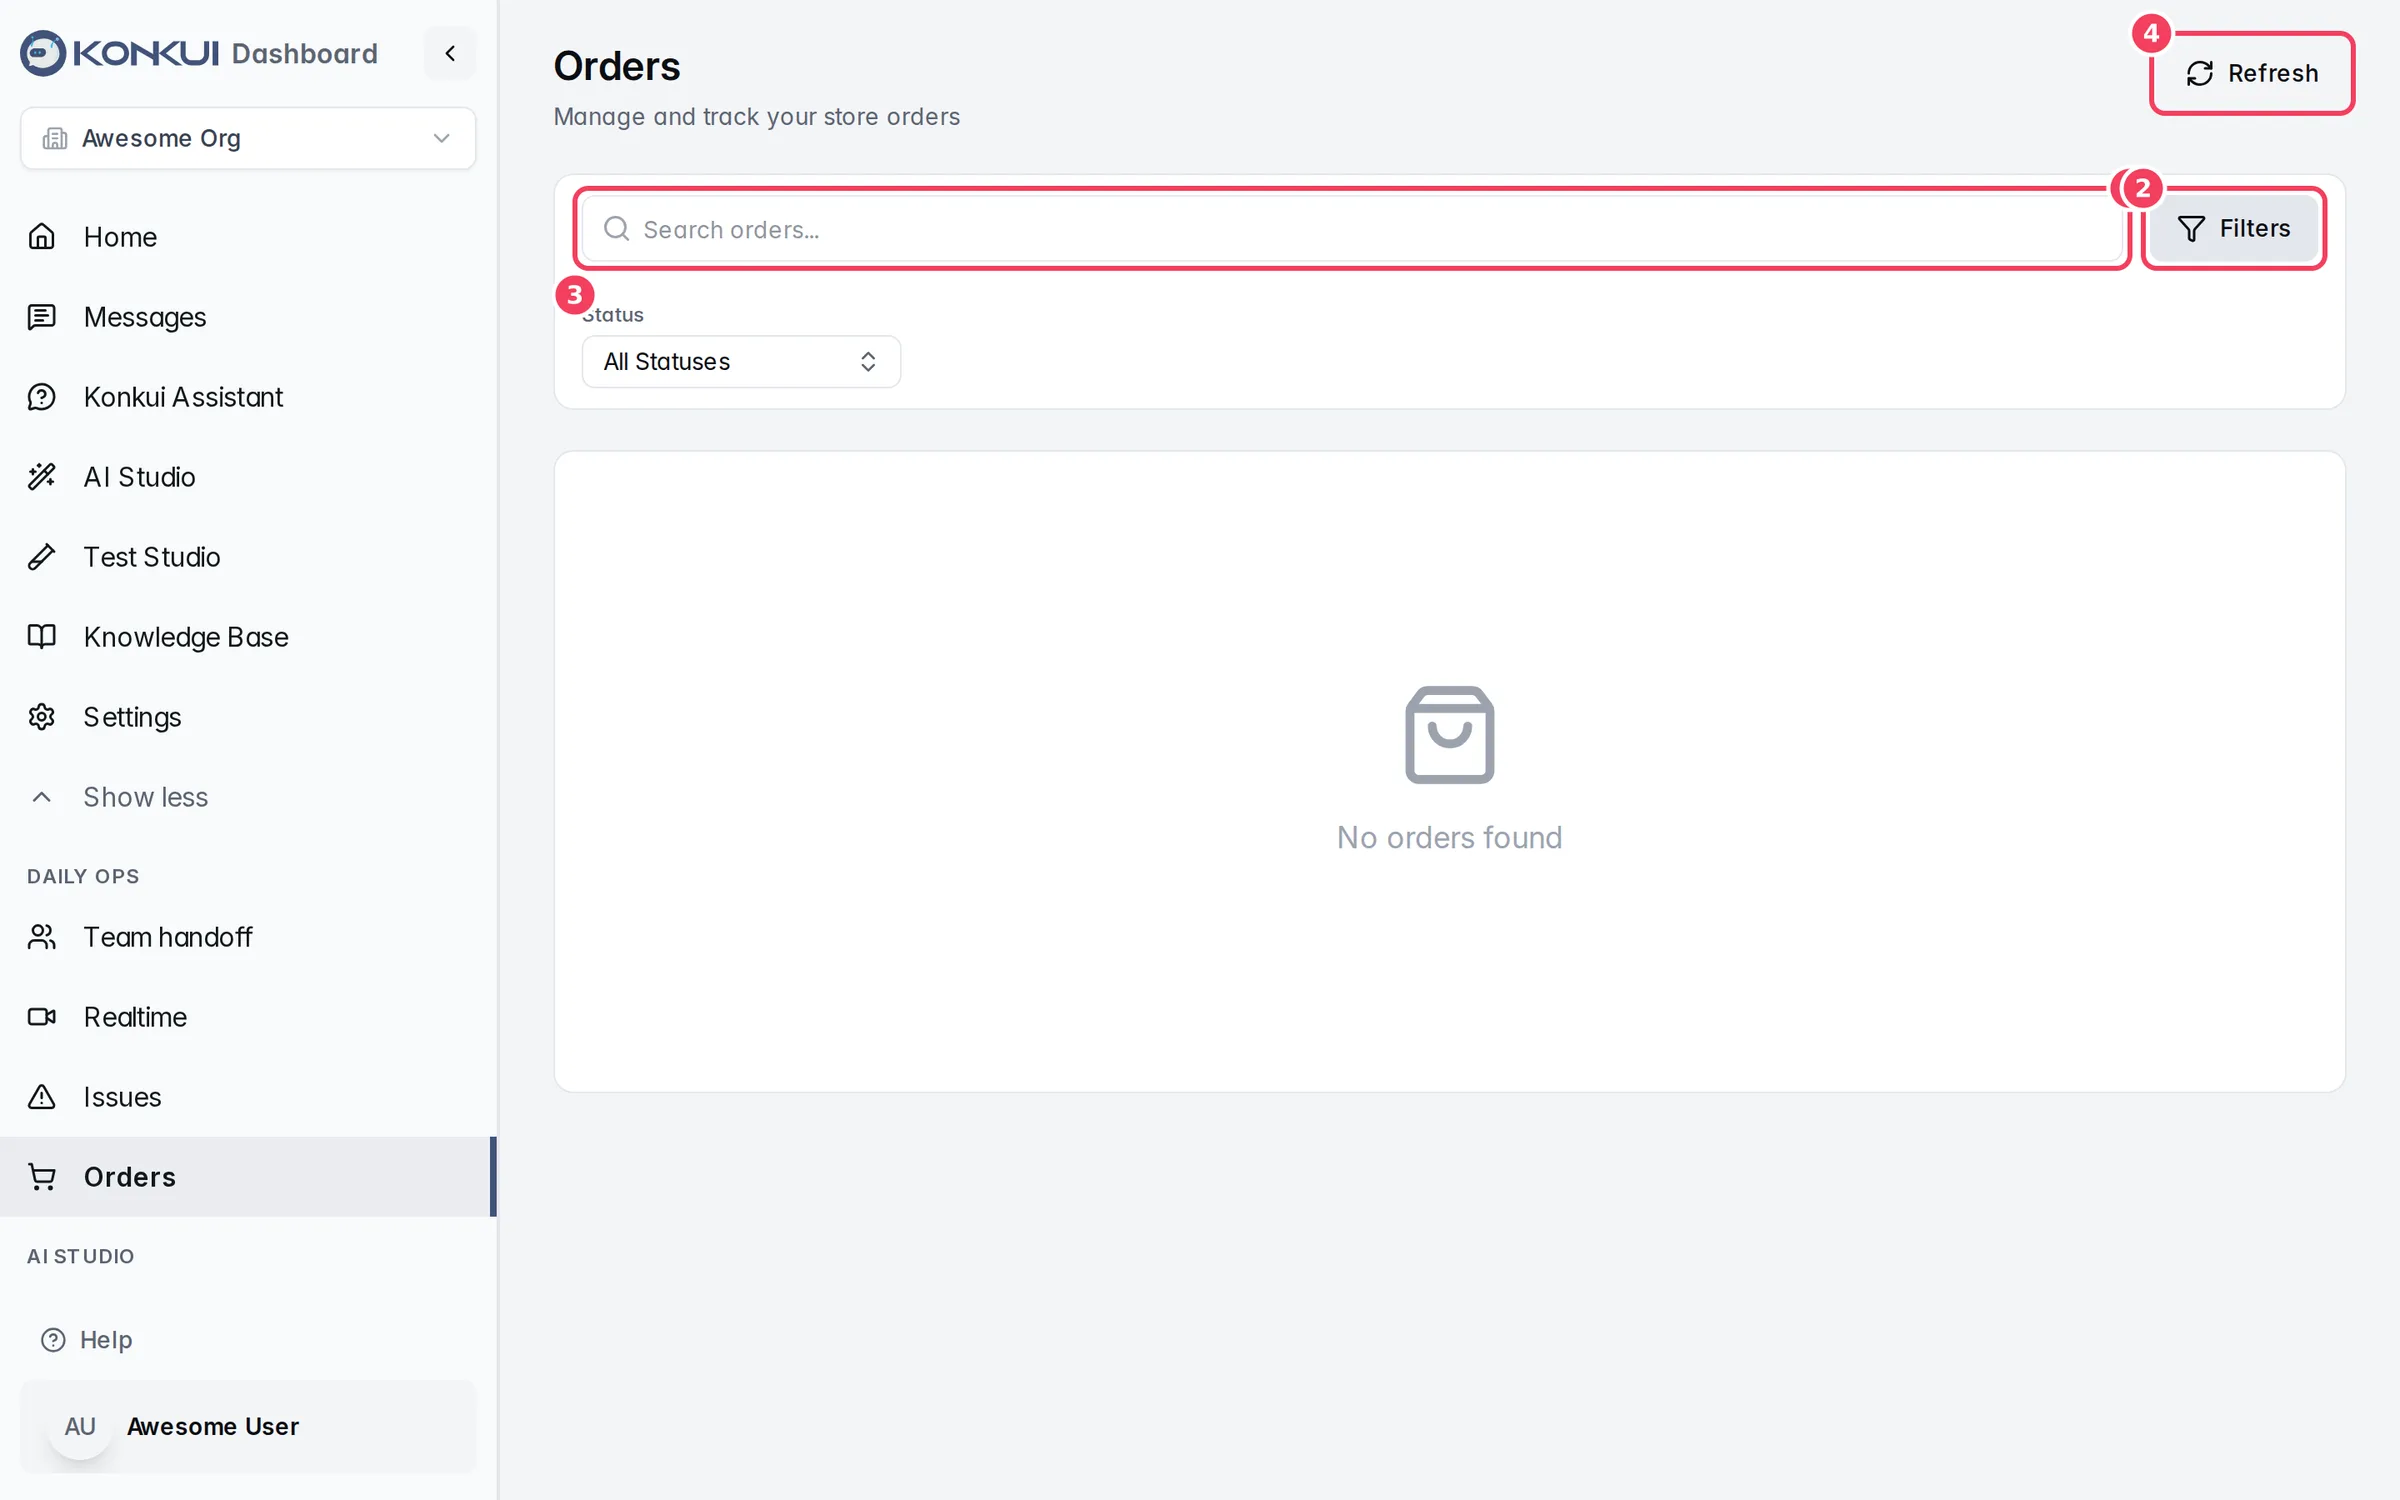
Confirm a bank-transfer payment
- Look for orders showing Verify slip in the PAYMENT column and open one.
- In Payment, check the slip (use Download slip to see it full size) against your bank statement: amount, date and receiving account.
- Click Confirm payment if it matches. The order becomes Paid and the customer is notified by email or LINE when the order has those details.
- If it doesn't match, click Reject, add a Reason, and click Reject payment. The order is cancelled and its stock released.
Fulfil the order
- Click Update Order.
- Move the Order Status to Processing while you prepare it, then Shipped with the Tracking Number, and finally Delivered. You can also use the quick actions in the order list.
- Use Internal Note for anything your team should know.
Check that it works
Place a test order yourself:
- Open your storefront, add a product to the cart and check out, choosing Manual Bank Transfer.
- Upload any image as the slip.
- In Orders, the order appears with Verify slip. Open it, click Reject and Reject payment so the test order is cancelled and its stock returns.
Next steps
- Products reference
- Orders reference
- Settings › Storefront reference
- Test and improve your bot, to check how the AI answers product questions.